ASP.NET Core Policy Authorization vs. ASPSecurityKit Activity-Data Authorization (ADA)
20 minute read
In this guide
This guide provides you a comprehensive comparison of ASP.NET authorization options with ASPSecurityKit’s activity-data authorization (ADA) using a real-world digital banking system as an example – including declarative role-based authorization vs. permission-based authorization, ASP.NET resource authorization (requirements/handlers) vs. ADA’s unobtrusive, automatic discovery and authorization of resources, authorizing resources by their ancestors, and option to write custom authorization rules without violating shared logic space and separation of concern principle. The guide also teaches you important ADA concepts with examples.
To learn more about ADA, consult the design guide and The comprehensive how-to documentation article.
A video based on this guide is available on ASPSecurityKit’s Youtube channel.
Introduction
If you’re building a web application, do you know what your users instinctively expect from you? They expect from you and they trust you that you’ve left no stone unturned to create a safe platform for their sensitive personal and business data, especially during current times, when cybercrimes like data theft and ransomware are rapidly increasing.
what are the two fundamental security controls of a web app?
- Authentication: By which we identify the callers and establish their identities.
- Authorization: By which we determine whether or not a given identity can perform the specified action on the specified data.
With ASP.NET Core policy-based authorization (including its derivatives declarative role-based and resource-based authorization controls), there’s literally no way to perform authorization checks on data unobtrusively, that is, you’ve to write a lot of code for it. And remember, the more the repetative code you write related to security, the higher the possibility of having bugs or security vulnerabilities, not to mention the amount of time you need to write and maintain such code.
If you doubt the above statement, I promise you that by the end of this guide, all of your doubts will be put to rest eternally!
But don’t worry, you’ll also discover a far better solution in the form of ASPSecurityKit Activity-Data Authorization (ADA), and you’ll ask yourself, “how have I been writing web software without it so far?”
Compare by example
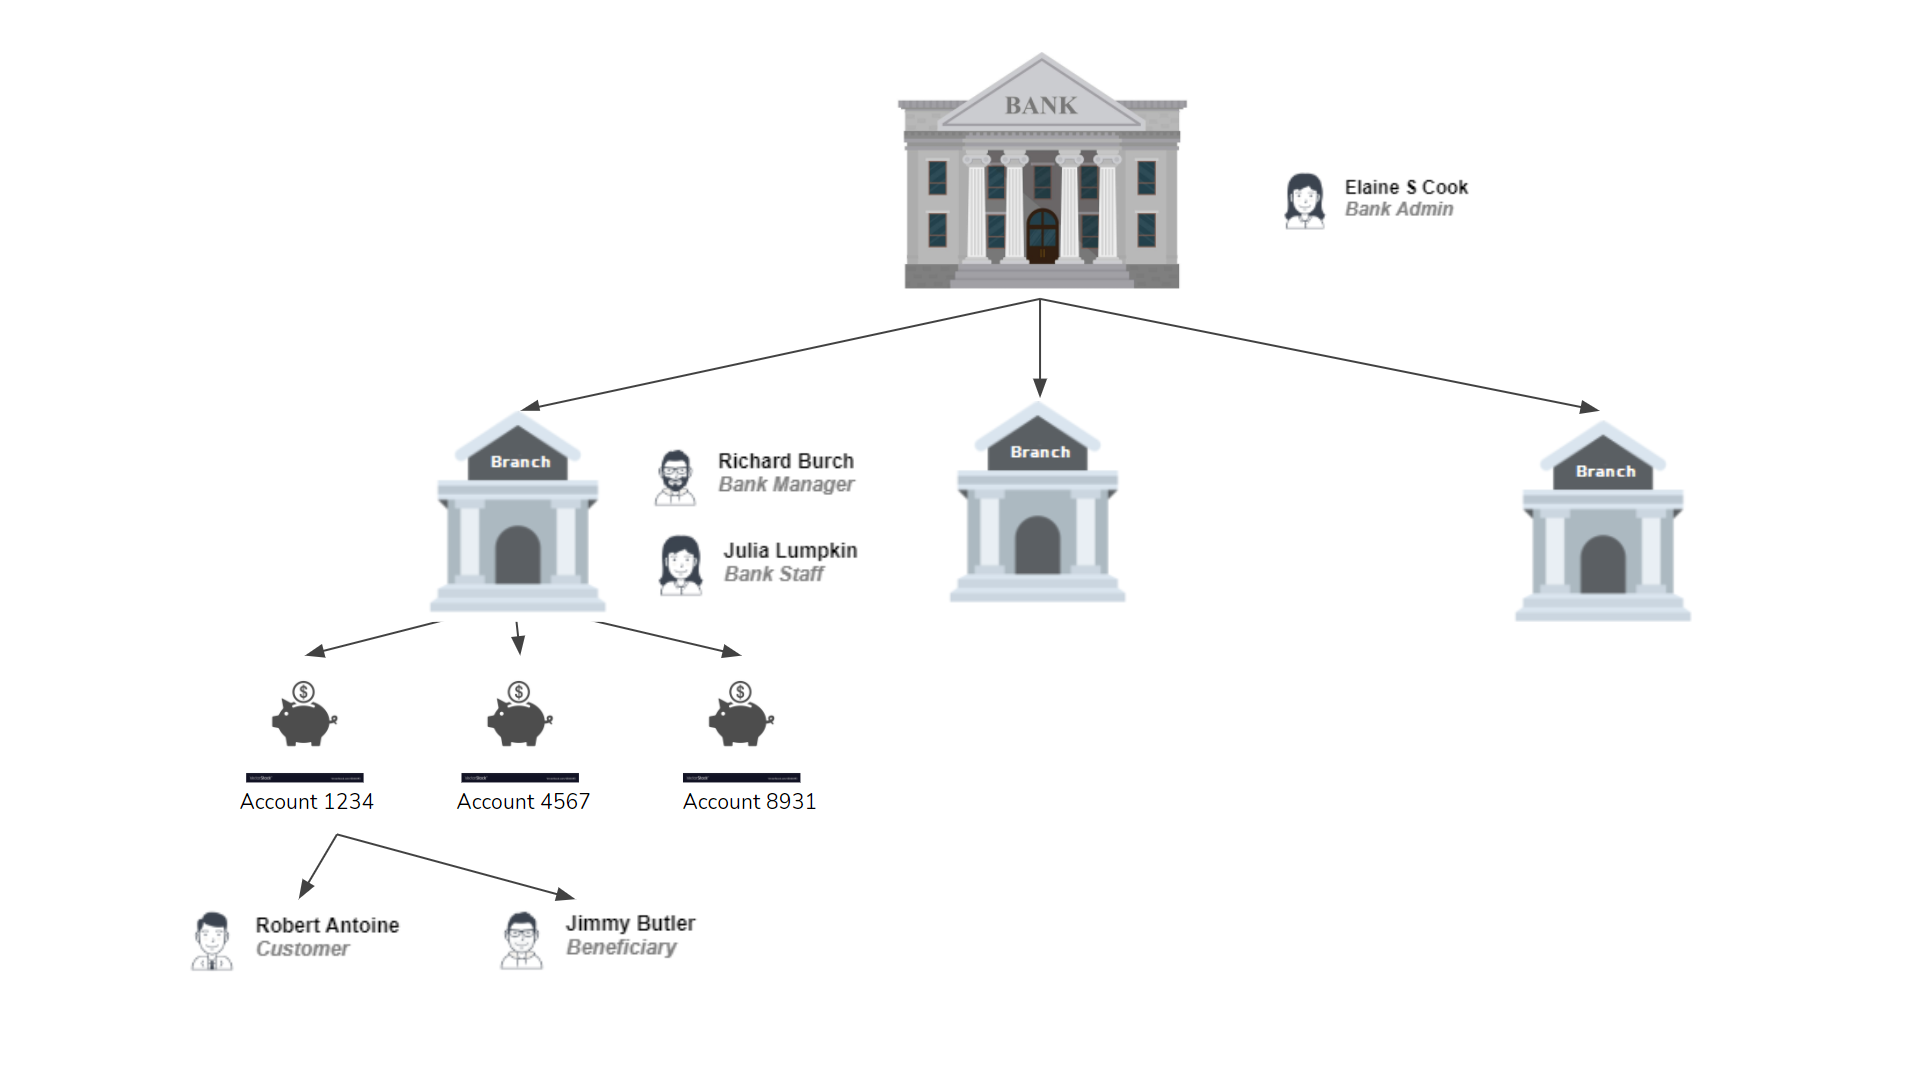
To demonstrate issues with the default ASP.NET authorization, let’s consider an example of a real-world system called SuperFinance, which is a digital banking web app, and you need to build it for a bank. The bank can have admin users with access to the entire bank, a set of branches each having manager and other staff users with access to their specific branches. Customers can own one or more accounts, or they can also be beneficiaries of one or more accounts (with read-only access).
Declarative Role-based vs. permission-based authorization
The ASP.NET approach
In ASP.NET declarative role-based authorization, you hard-code roles with actions using the AuthorizationAttribute as follows:
public class AccountController : Controller
{
	[Authorize(Roles = "BankAdmin, BranchManager, Customer")]
	public async Task<IActionResult> List()
	{
		...
	}
}
The problem
This declarative approach has two major problems:
-
No flexibility. Suppose the bank comes up with an urgent requirement to setup read access to the system for the auditors. Since the roles have been hard-coded, you’ve to update all the get actions and add audit role, perform extensive testing, and redeploy. You can easily guess how stressful and time-consuming such a change request would be.
-
Lost visibility into roles-to-actions mapping. Since the roles are hard-coded, there’s no visibility into the actual state of roles-to-actions mapping, i.e., which roles have got access to what all actions in the deployed system. This can lead to a state of unintended role assignment. Suppose, a developer on the system gets a task to implement the
SetStatusaction after the Auditor access has been implemented. Developers usually don’t like to rewrite the same, boilerplate code, so in this case, this developer, following the natural habit, starts by copying an existing action of the controller – sayListAccount. During the edit, he removes theAuditorrole but misses the removal of theCustomerrole
[Authorize(Roles = "BankAdmin, BranchManager, Customer")]
public async Task<IActionResult> SetStatus()
{
	...
}
Now the Customer users are allowed to execute the SetStatus action while it was meant only for the banking staff. Clearly, a simple mistake like this, which isn’t uncommon by any stretch of the imagination, can give critical privileges to unintended users which would be hard to detect once deployed because it’s hidden in code.
The ASPSecurityKit approach
To solve these problems with hard-coded role-based authorization, ASPSecurityKit instead proposes you activity-based and data-aware authorization (ADA) which works as follows:
- Every action is authorized based on only one permission, often unique for that action, and these permissions are stored in the database. Examples:
Permissions
| PermissionCode | EntityType |
|---|---|
| CreateAccount | Account |
| GetAccount | Account |
| ListAccount | Account |
| UpdateAccount | Account |
| ListTransaction | Transaction |
| RevertTransaction | Transaction |
- By default, this permissionCode is automatically determined by combining the names of action and controller, for instance,
ListAccountbecomes the permissionCode for theAccountController.Listaction. - Permissions are granted to users as permits on some resource (called entityId) or on all resources (with
nullentityId), as records in the database. Examples:
UserPermits
| User | PermissionCode | EntityURN |
|---|---|---|
| Elaine | ListAccount | null |
| Richard | ListAccount | null |
| Jimmy | ListAccount | null |
| Jimmy | UpdateAccount | urn:account:AC2E |
-
Permits are loaded into session upon login (or when the identity loads), each along with its implied permissions, and actions are authorized by ADA depending upon whether or not their associated permissionCodes exist in user’s permit set (resource or entityId if applicable, is also checked but we’ll discuss about it in next section).
-
Roles are abstracted away in the database just like other permissions. Examples:
Permissions
| PermissionCode | EntityType | Description |
|---|---|---|
| BankAdmin | Bank | A role permission representing the bank admin |
| BranchManager | Branch | A role permission representing the branch manager |
| BranchStaff | Branch | A role permission representing the branch staff |
| Customer | Account | A role permission representing the customer |
- And actions are associated with roles using the implied permission construct. Examples:
ImpliedPermissions
| PermissionCode | ImpliedPermissionCode |
|---|---|
| BankAdmin | ListAccount |
| BankAdmin | GetAccount |
| BankAdmin | SetStatus |
| BranchManager | ListAccount |
| BranchManager | GetAccount |
| BranchManager | SetStatus |
| Customer | ListAccount |
| Customer | GetAccount |
- This gives the ultimate flexibility of granting both roles and some permission as permits to the user if needed. Examples:
UserPermits
| User | PermissionCode | EntityURN |
|---|---|---|
| Elaine | BankAdmin | urn:bank:BA25 |
| Richard | BranchManager | urn:branch:BC4F |
| Jimmy | Customer | urn:account:AC2E |
- With ADA, the
Account.Listaction looks as follows (notice lack of any explicit roles or even permission related attributes):
public class AccountController : Controller
{
	public async Task<IActionResult> List()
	{
		...
	}
}
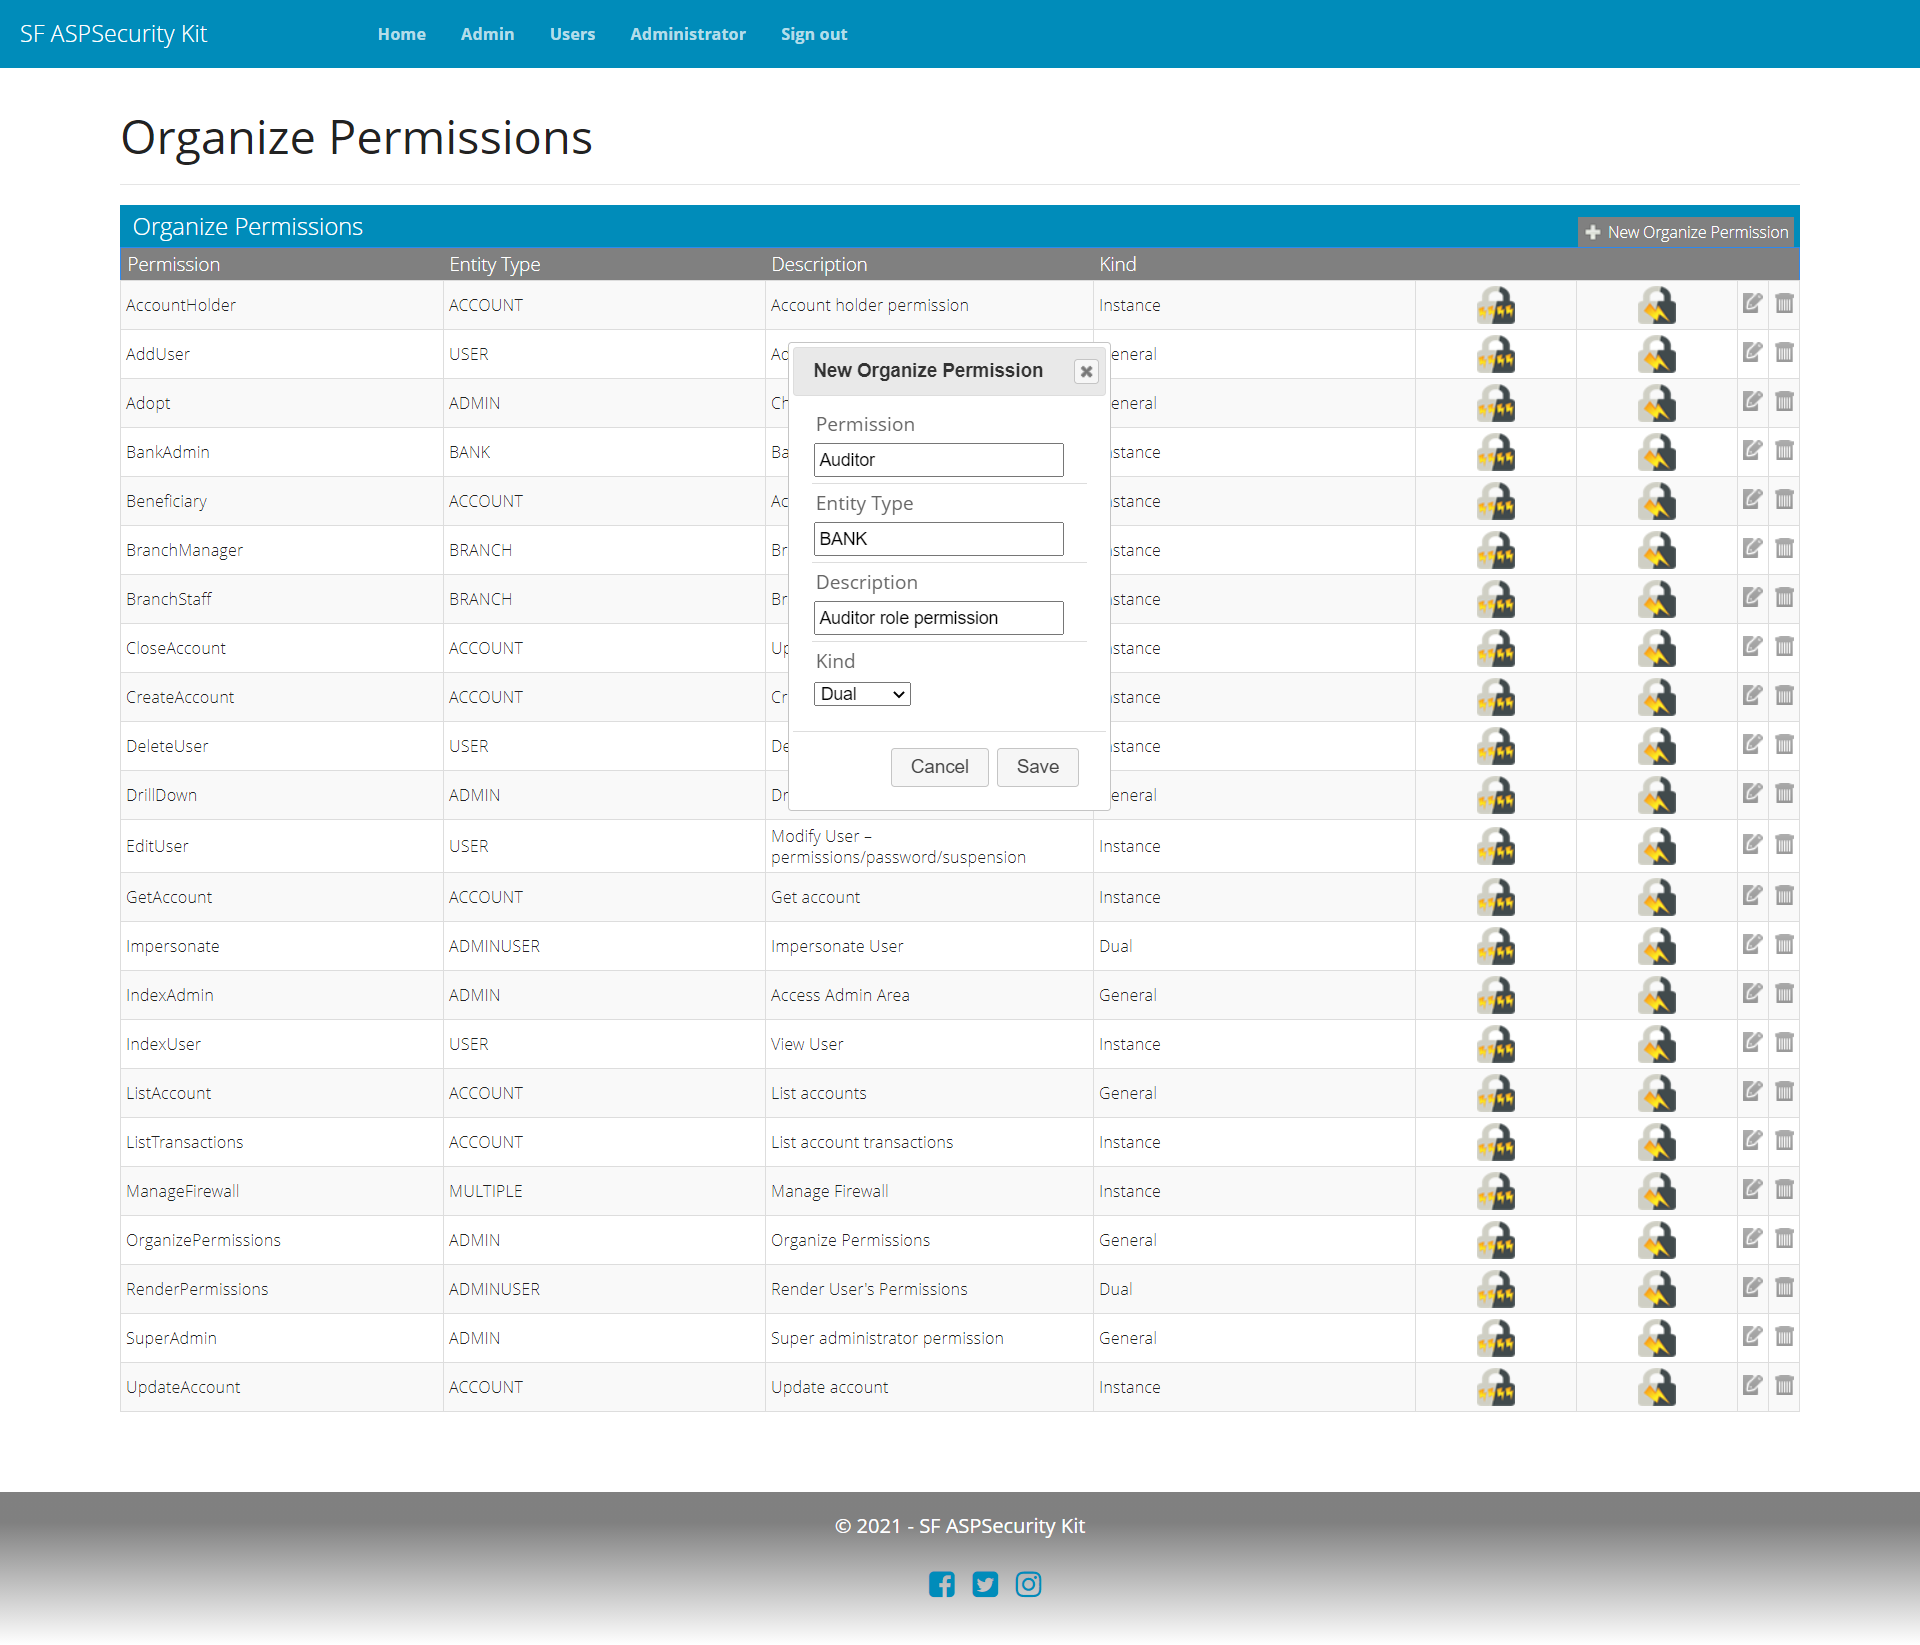
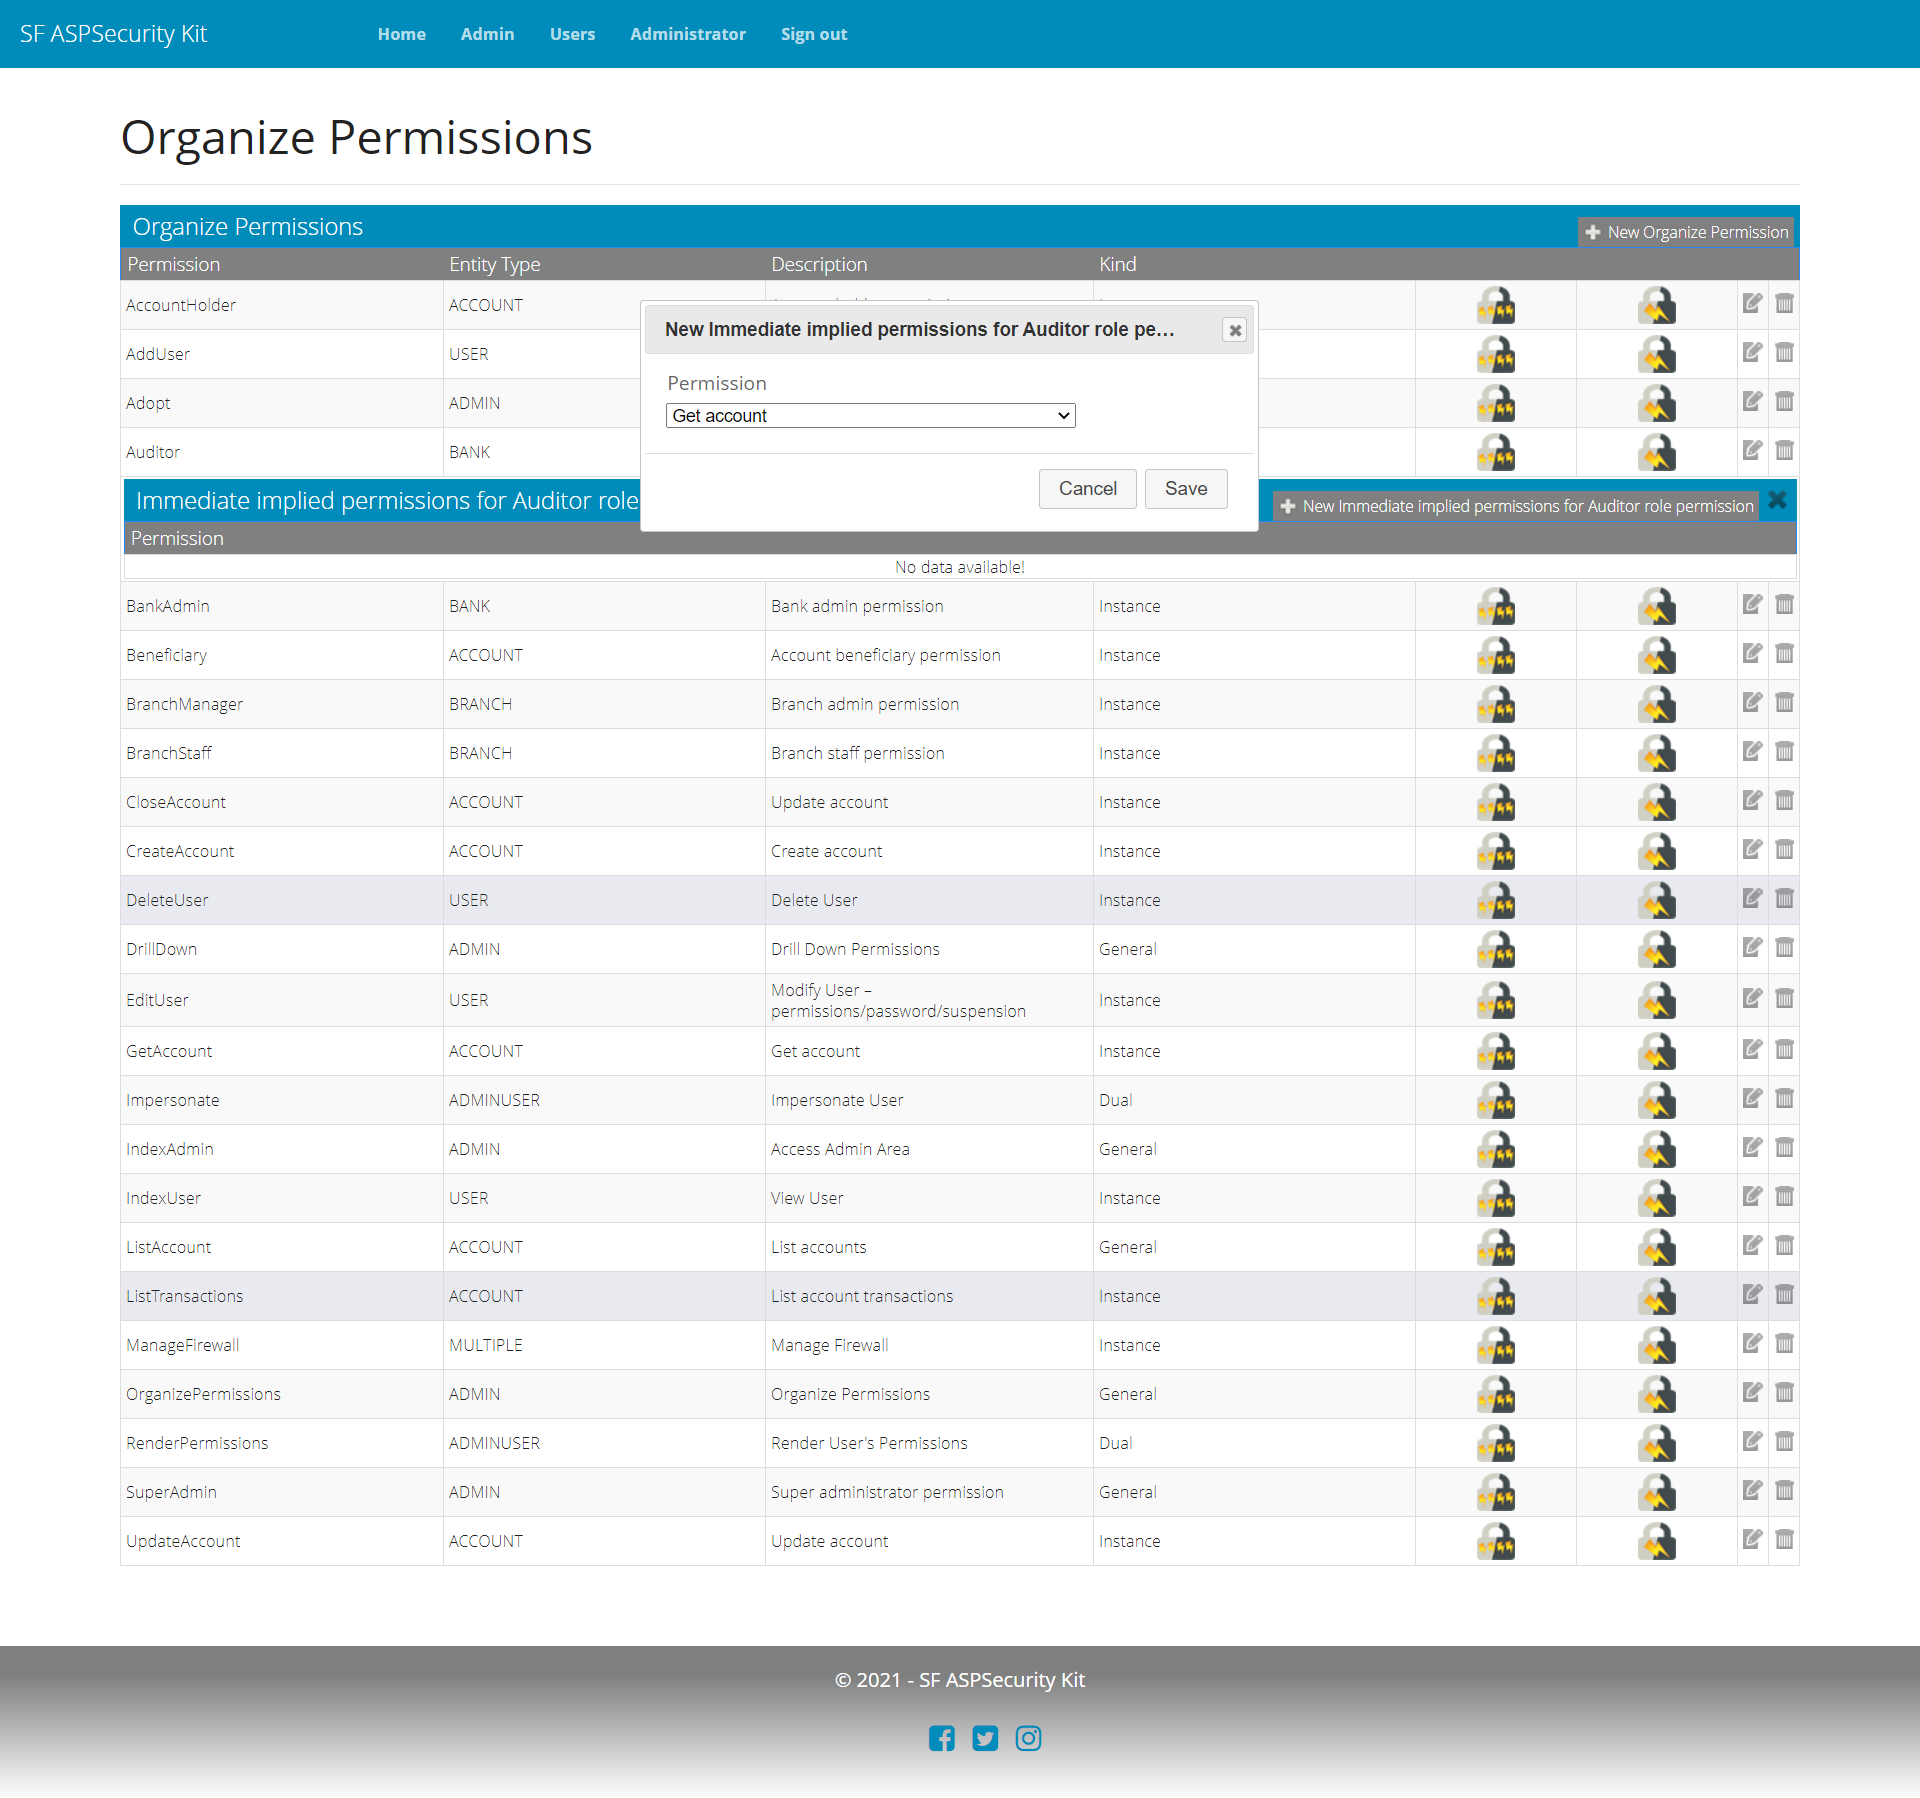
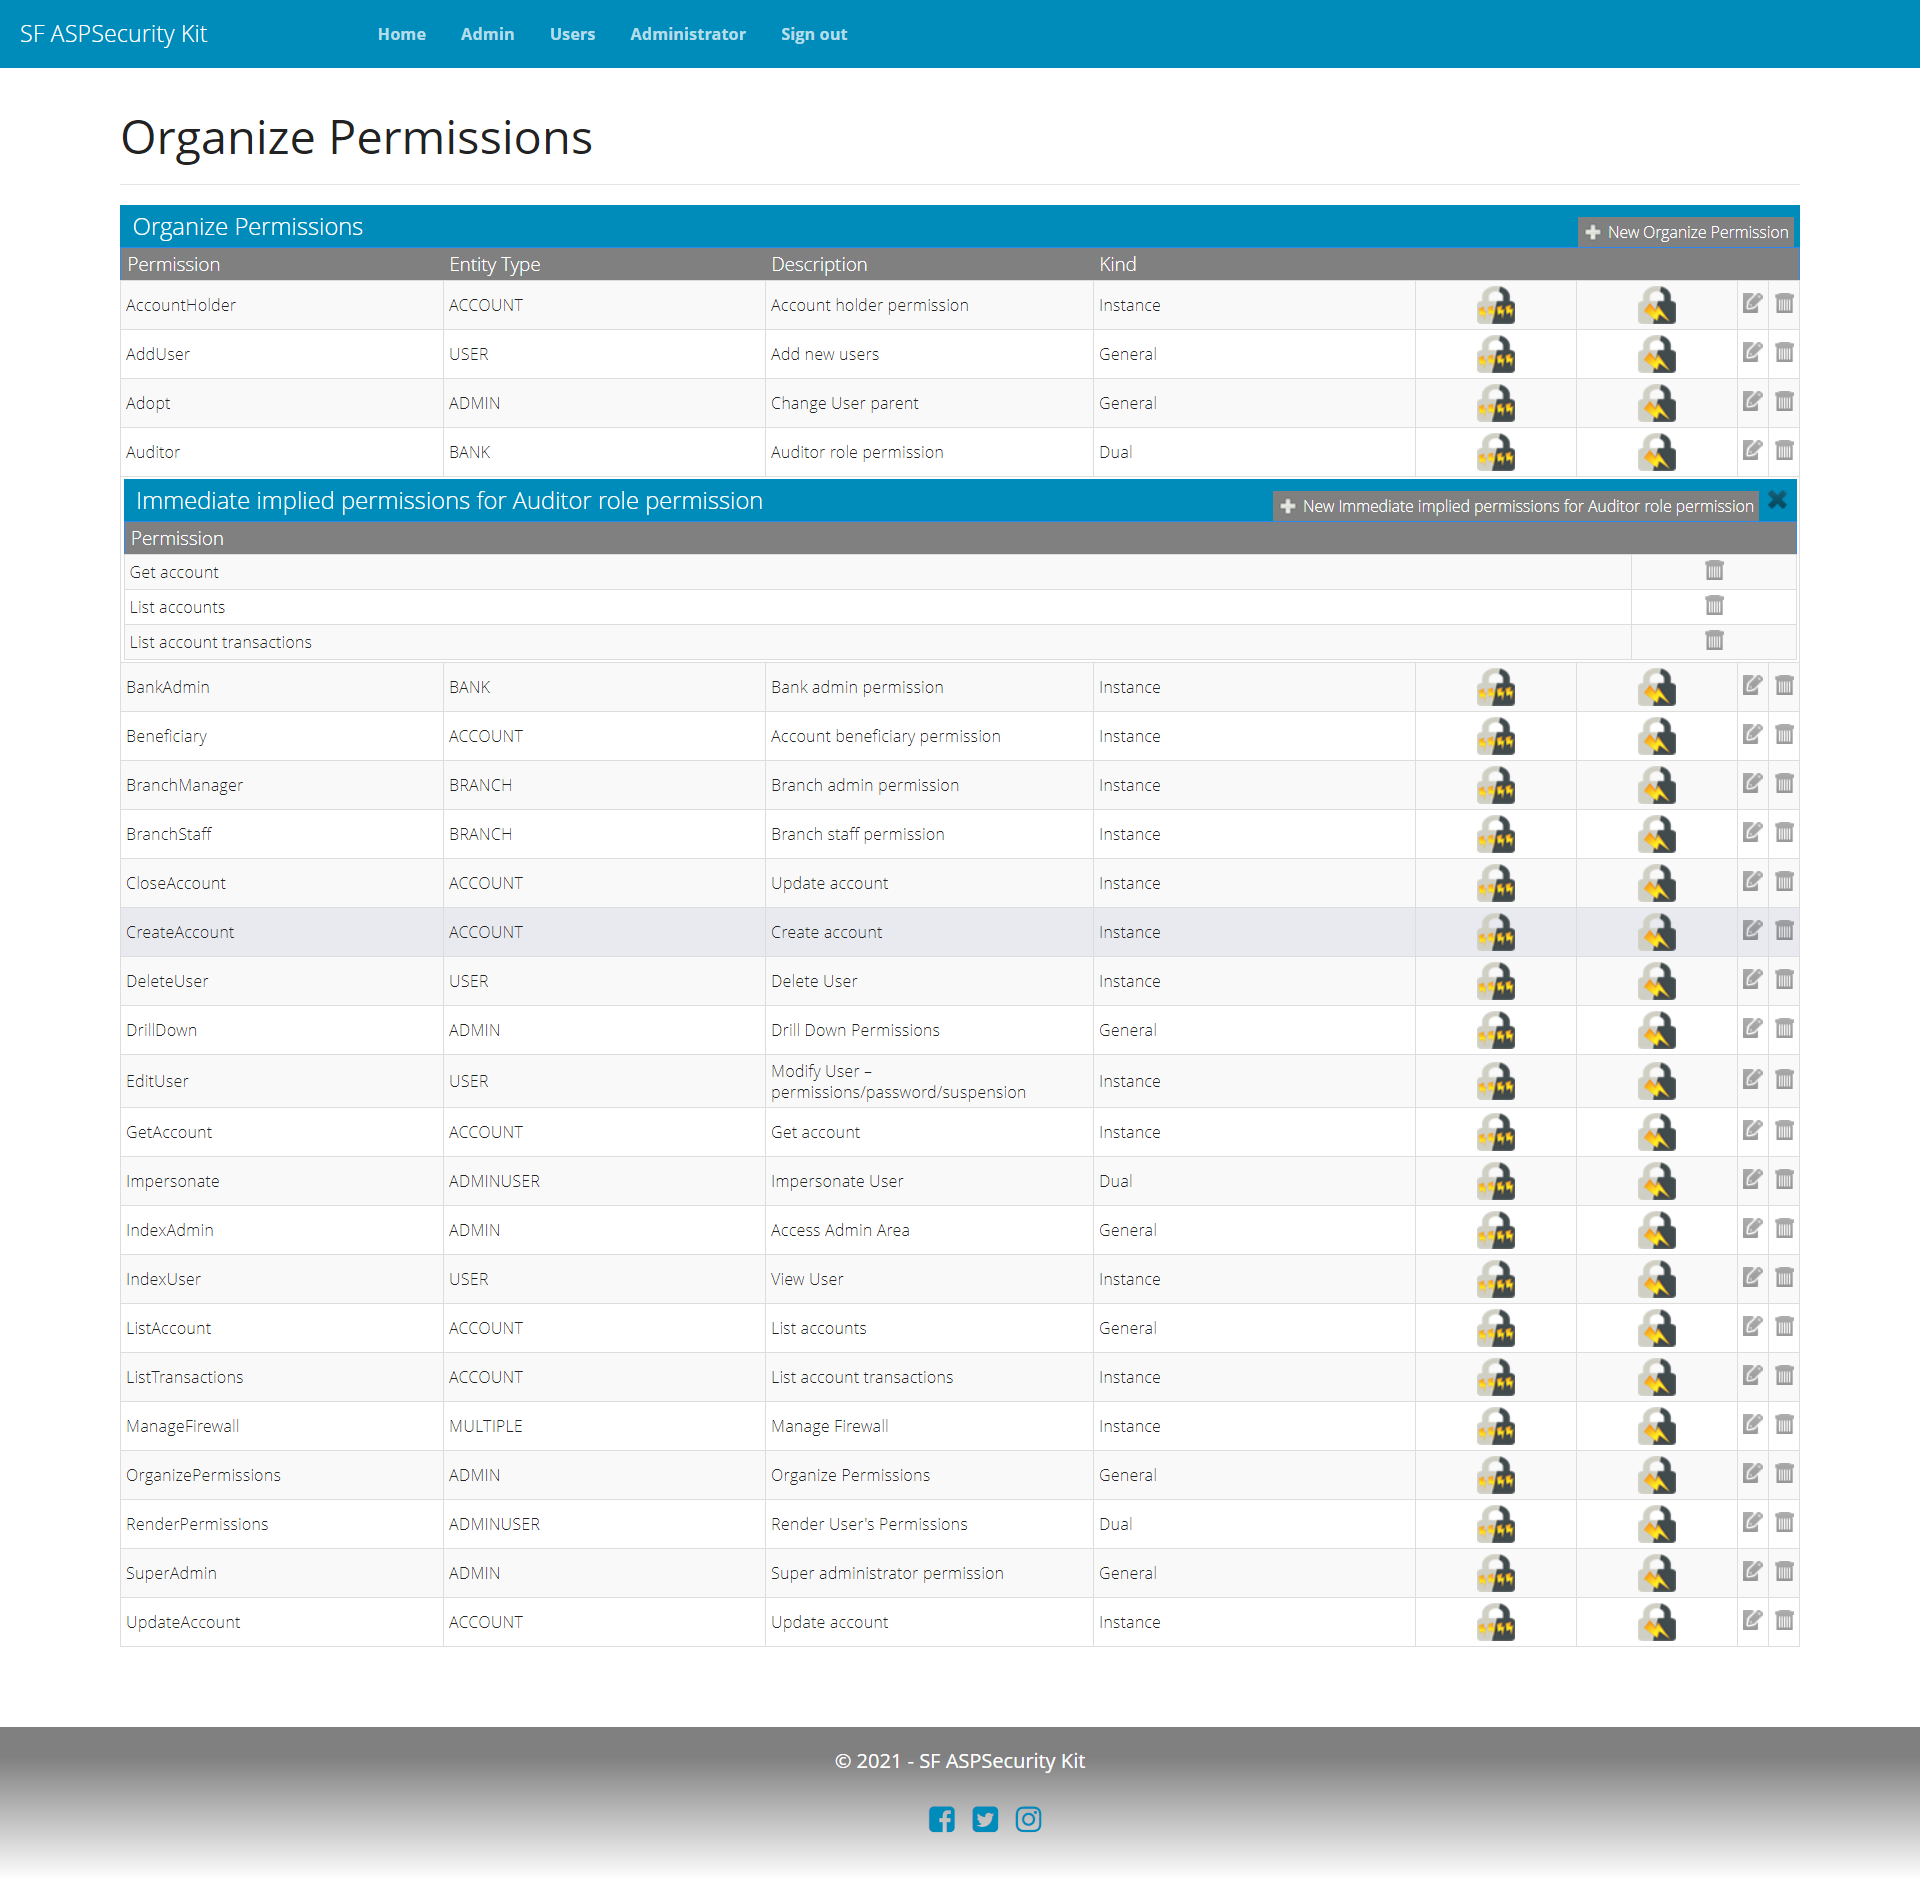
Setting up Auditor access
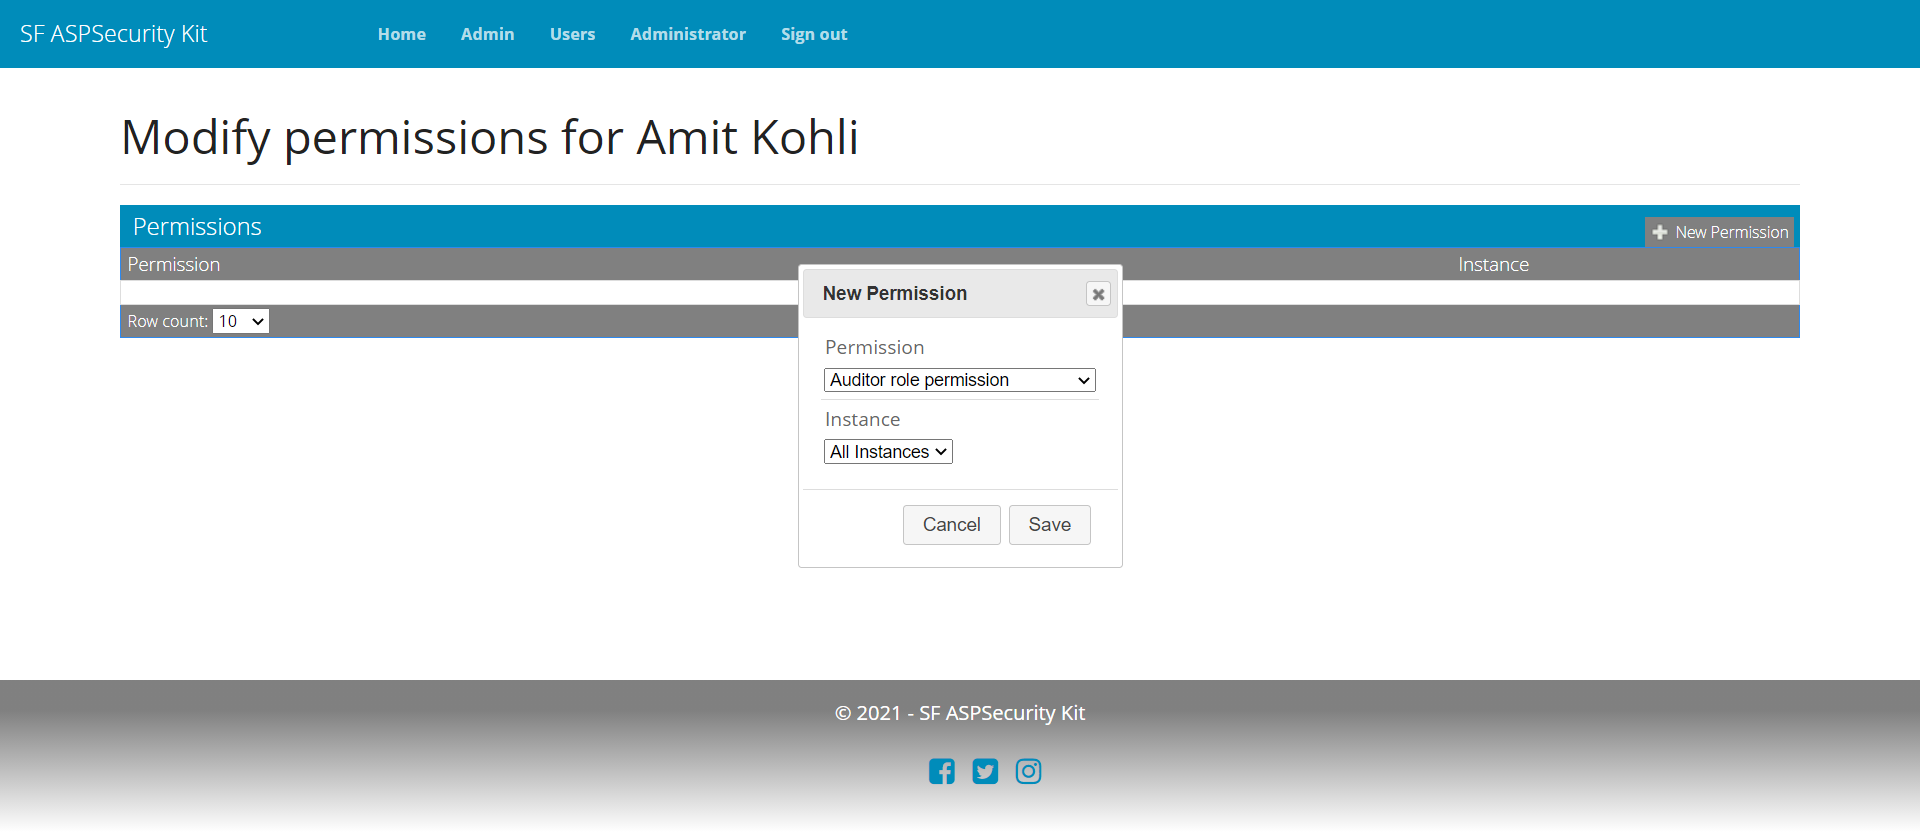
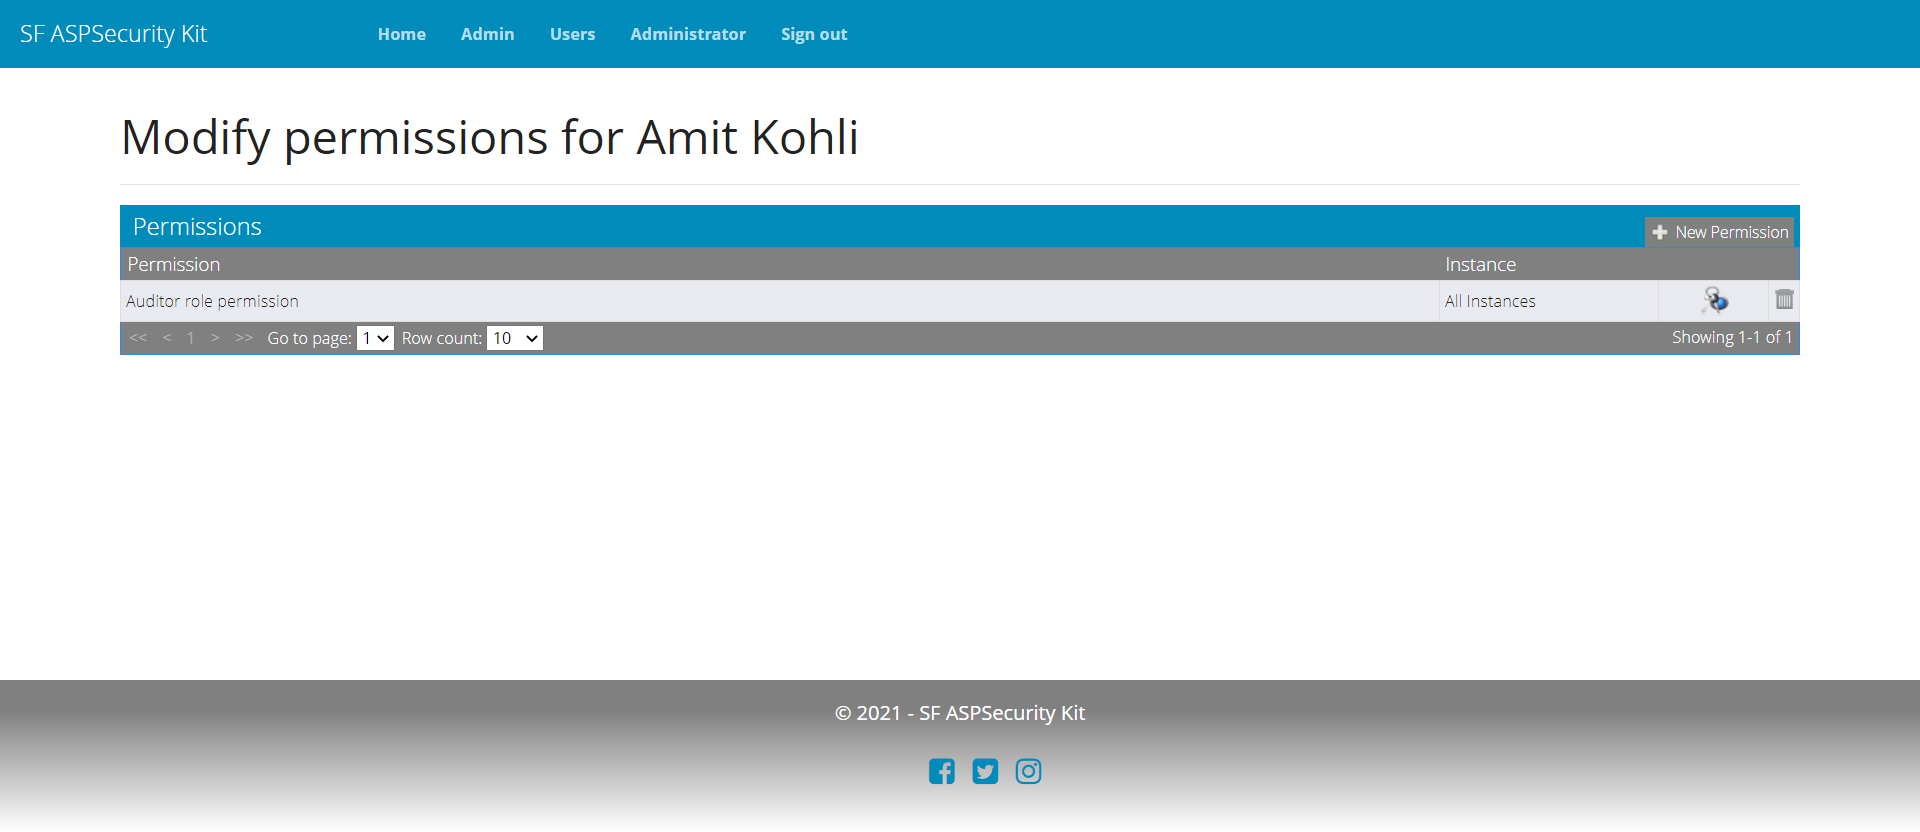
To handle the urgent requirement of auditor access, you simply create a new role permission in the database (or through UI/API as provided by the Premium source package), associate get actions as implied permissions with it, and grant the Auditor as permit to the user (again, Premium packages come with permit management workflow (for both MVC and API).
Summary
Thus, with ASPSecurityKit’s activity-based authorization (ADA), site admins have full visibility of roles-to-action mapping through the UI/database, flexibility to change it without raising a change request to the development team, and the code looks cleaner without having roles hard-coded (the next section will show this aspect in greater details).
Authorizing resource (identifier): hard-coded explicit checks vs. automatic discovery and implicit checks
The ASP.NET approach
IN ASP.NET resource authorization, you have to manually authorize each resource referred in the action. Consider the following action:
public class AccountController : Controller
{
	public async Task<IActionResult> Get(Guid accountId)
	{
		...
	}
}
The action parameter acountId is a resource because it’s a entityId (the key value) of an existing account record in the database, and thus, a user must be authorized to determine whether or not she has access to the associated account.
However, to authorize it in ASP.NET, you have to do all of the following:
- Declare the ReadAccount authorization requirement:
public static class Operations
{
	public static OperationAuthorizationRequirement ReadAccount = new OperationAuthorizationRequirement { Name = nameof(ReadAccount) };
}
- Write the account authorization handler that determines whether or not the given account is accessible depending on the current user’s role:
public class AccountAuthorizationCrudHandler : AuthorizationHandler<OperationAuthorizationRequirement, DbAccount>
{
	protected override Task HandleRequirementAsync(AuthorizationHandlerContext context,
		OperationAuthorizationRequirement requirement, DbAccount account)
	{
		if (IsBankAdmin(context.User))
		{
			if (account.Branch.BankId == context.User.Get<Guid>("BankId"))
			{
				if (requirement.Name == Operations.ReadAccount.Name)
				{
					context.Succeed(requirement);
				}
			}
		}
		else if (IsBranchManager(context.User))
		{
			if (account.BranchId == context.User.Get<Guid>("BranchId"))
			{
				if (requirement.Name == Operations.ReadAccount.Name)
				{
					context.Succeed(requirement);
				}
			}
		}
		else if (IsCustomer(context.User))
		{
			var userId = context.User.Get<Guid>("UserId");
			if (account.OwningUserId == userId)
			{
				if (requirement.Name == Operations.ReadAccount.Name)
				{
					context.Succeed(requirement);
				}
			}
			else if (account.Beneficiaries.Any(x => x.BeneficiaryUserId == userId))
			{
				if (requirement.Name == Operations.ReadAccount.Name)
				{
					context.Succeed(requirement);
				}
			}
		}

		return Task.CompletedTask;
	}

	private bool IsBankAdmin(ClaimsPrincipal user)
		=> user.Get<string>(ClaimTypes.Role).Equals("BankAdmin");

	private bool IsBranchManager(ClaimsPrincipal user)
		=> user.Get<string>(ClaimTypes.Role).Equals("BranchManager");

	private bool IsCustomer(ClaimsPrincipal user)
		=> user.Get<string>(ClaimTypes.Role).Equals("Customer");
}
- Finally, write the logic in
Getaction to invoke the resource service forReadAccountaccess and responding as per its result.
public async Task<IActionResult> Get(Guid accountId)
{
	var dbAccount = await _accountRepository.GetAccount(accountId);
	if (dbAccount == null)
	{
		return new NotFoundResult();
	}

	var authorizationResult = await _authorizationService
		.AuthorizeAsync(User, dbAccount, Operations.ReadAccount);

	if (authorizationResult.Succeeded)
	{
		return View(dbAccount);
	}
	else if (User.Identity.IsAuthenticated)
	{
		return new ForbidResult();
	}
	else
	{
		return new ChallengeResult();
	}
}
The problem
The above approach has several problems:
- There is a lot of code you’ve to write to authorize just one resource in the request, imagine if there are multiple resources?
- Due to the various paths present in the authorization logic (in both action and authorization handler), the automation tests, and the time required to perform manual tests will also increase exponentially to achieve acceptable coverage.
- The authorization handlers hard-codes role-based checks, and thus suffer from the same problems of inflexibility and loss of visibility into the roles-to-actions mappings we saw in the previous section.
- The code is quite verbose and you’ve to repeat a lot of boilerplate logic in every action and every handler, and as we saw in the previous section, this can lead to simple yet costly mistakes. For instance, to implement a new action – say
Account.Update– you start by copyingAccount.Get, and edit it like so:
[HttpPost]
public async Task<IActionResult> Update(AccountViewModel model)
{
	var dbAccount = await _accountRepository.GetAccount(model.AccountId);
	if (dbAccount == null)
	{
		return new NotFoundResult();
	}

	var authorizationResult = await _authorizationService
		.AuthorizeAsync(User, dbAccount, Operations.ReadAccount);

	if (authorizationResult.Succeeded)
	{
		var result = await _accountRepository.UpdateAccount(model);
		return View(result);
	}
	else if (User.Identity.IsAuthenticated)
	{
		return new ForbidResult();
	}
	else
	{
		return new ChallengeResult();
	}
}
- Do you see any issue in the above code? No? Well, observe carefully! We’ve forgotten to change
Operations.ReadAccountin the call to_authorizationService.AuthorizeAsync. What does this mean? Simply that whoever hasReadAccountaccess, will also be able to update the account; includingAuditorandCustomerroles. Simple mistake right? But you can imagine the potential consequences of such simple mistakes for the business. - The same mistake can occur in handler; the conditions you write to authorize a role; the comparison you perform to match incoming account with permitted user’s values – all are quite verbose and subject to omission or addition of unwanted checks.
- By now it’s already clear but for the sake of completeness, we can mention this issue as well that for each new action, The authorization logic will be repeated. The authorization requirement declarations and their handlers, if shared, are going to increase in complexity, otherwise, the number of handlers will increase. The complexity will again compound the possibility of introducing subtle yet costly mistakes.
The ASPSecurityKit approach
With ASPSecurityKit’s ADA, you don’t need to write all such verbose authorization logic to authorize resources. Considering the same example of Account.Get action, ADA can automatically recognize accountId parameter as a resource to be authorized, based on a convention which you can extend or override for your project. So, this is how the implementation of the same action looks when you use ADA:
public async Task<IActionResult> Get(Guid accountId)
{
	var result = await _accountRepository.GetAccount(accountId);
	return View(result);
}
You literally need not write any logic to authorize accountId – no authorization requirement declaration, no handler, not even logic to invoke and handle result from some authorization service – ADA does it for you automatically.
How it works!
Surprised? You can be upon first look, but once you understand how ADA works under the hood (which we’ve already gone through at a high-level in the previous section, and the comprehensive explanation for the same can be found in the how-to docs article), you’ll appreciate how much it does for you to make it so simple.
However, for the sake of understanding in terms of the current example, let’s go through the steps (at a high-level) ADA performs to authorize this specific action:
- First, upon receiving the
Account.Getrequest, the security pipeline authenticates (i.e., establishes the identity) of the caller. During this process, user’s permits collection is loaded. - Once the pipeline arrives at ADA for activity authorization, it first determines the permissionCode for the action as ‘GetAccount’.
- Next, it traverses through the action parameters, and finds that it has only
accountIdas resource to authorize.- ADA can find resource parameters even if those are nested deep in any of the input models hierarchy.
- It then checks whether or not user has a permit with permissionCode as ‘GetAccount’ and entityId as value of
accountId. - If the permit is found, request is authorized and action is allowed to execute; otherwise, appropriate error is reported to the caller.
Summary
Thus, to authorize resources with ADA, you don’t need to write authorization handlers, requirement declarations, nor any authorization logic in actions – you get a perfectly clean implementation of actions having only business logic and authorization is managed unobtrusively by ADA.
Related references vs. role-based explicit comparison of ancestors
The ASP.NET approach
A resource is always authorized based on its relationship with the current user. For instance, as we saw in the AccountAuthorizationCrudHandler,
if (IsBankAdmin(context.User))
{
	if (account.Branch.BankId == context.User.Get<Guid>("BankId"))
	{
		if (requirement.Name == Operations.ReadAccount.Name)
		{
			context.Succeed(requirement);
		}
	}
}
If the current user is bankAdmin, her bank must be the same as that of the account’s bank. Similarly for branchManager,
else if (IsBranchManager(context.User))
{
	if (account.BranchId == context.User.Get<Guid>("BranchId"))
	{
		if (requirement.Name == Operations.ReadAccount.Name)
		{
			context.Succeed(requirement);
		}
	}
}
Both manager and account must belong to the same branch, to allow the current action.
Here both branch and bank have a relationship with account and that is, both are ancestors of account. So, there’s this hierarchy between entities, and you often observe this hierarchy in most systems. In fact, anything that belongs to a user has the user as its parent.
But this code is quite verbose as the comparison is done separately for each role explicitly and the comparison itself is hard-coded which is subject to the same problems of omission and mistakes.
The ASPSecurityKit approach
The above way of authorizing higher-level roles by comparing resources or entities at the level of their ancestors has great advantages in permit-based authorization as well. Because the higher the role, the greater number of resources it can access. For instance, in our banking example, BankAdmin can access all of the accounts belong to her bank which could be in thousands. So, having permits for all the combination of account-related actions and accountIds could very well go in tens of thousands. For BranchManager, it’ll also be in several hundred if not thousands.
ADA gives you an option to authorize resources at the level of their ancestors. It’s known as related references, and it just requires you to write a simple loader method only once per entity type, through which you return the desired ancestor entityIds along with the current entityId. For example, we can define such a method for accountId as follows:
public async Task<List<IdReference>> AccountId(Guid id)
{
	return await dbContext.Accounts
		.Where(x => x.Id == id)
		.Select(x => new List<Guid> { x.Id, x.BranchId, x.Branch.BankId })
		.ToIdReferenceListAsync();
}
(You only define the above method, in the referencesProvider class, and ADA picks it up automatically.)
When a related references loader method is defined for an entityId, ADA authorizes the resource if user has a permit for the action against any of the entityIds returned by the loader.
This means that if BankAdmin has a permit
'GetAccount','urn:bank:BA25'
she will be authorized to access any account that belongs to her bank. And indeed, she has such a permit in the in-memory permit set because of the implied permissions we had set up for BankAdmin role permission.
Summary
Thus, the related references feature of ADA lets you authorize resources by their ancestors (or by any other arbitrary related entities you wish) and help you keep the in-memory footprint of the user’s permit set small regardless of the number of resources a user has access to, thereby eliminating the only major issue with permission-based authorization, of the ever-growing permits collection.
Authorizing multiple resources
The ASP.NET approach
In ASP.NET resource authorization, As the number of resources to authorize increases, the authorization logic also grows exponentially. Consider the example of a ListTransaction action, which can return transactions based on one or more resources as specified by the following filter model:
public class TransactionFilterByModel
{
	public Guid? AccountId { get; set; }

	public Guid? BranchId { get; set; }

	public Guid? BankId { get; set; }
}
And the action is written as follows, (observe that each resource if having a value is being authorized.)
public async Task<IActionResult> ListTransaction(TransactionFilterByModel filter)
{
	if (filter.BankId == null && filter.BranchId == null && filter.AccountId == null)
		return new NotFoundResult();

	if (filter.BankId.HasValue)
	{
		var dbBank = await _bankRepository.GetBank(filter.BankId);
		if (dbBank == null)
		{
			return new NotFoundResult();
		}

		var authorizationResult = await _authorizationService
			.AuthorizeAsync(User, dbBank, Operations.ReadAccount);

		if (!authorizationResult.Succeeded)
		{
			if (User.Identity.IsAuthenticated)
			{
				return new ForbidResult();
			}
			else
			{
				return new ChallengeResult();
			}
		}
	}

	if (filter.BranchId.HasValue)
	{
		var dbBranch = await _bankRepository.GetBranch(filter.BranchId);
		if (dbBranch == null)
		{
			return new NotFoundResult();
		}

		var authorizationResult = await _authorizationService
			.AuthorizeAsync(User, dbBranch, Operations.ReadAccount);

		if (!authorizationResult.Succeeded)
		{
			if (User.Identity.IsAuthenticated)
			{
				return new ForbidResult();
			}
			else
			{
				return new ChallengeResult();
			}
		}
	}

	if (filter.AccountId.HasValue)
	{
		var dbAccount = await _accountRepository.GetAccount(filter.AccountId);
		if (dbAccount == null)
		{
			return new NotFoundResult();
		}

		var authorizationResult = await _authorizationService
			.AuthorizeAsync(User, dbAccount, Operations.ReadAccount);

		if (!authorizationResult.Succeeded)
		{
			if (User.Identity.IsAuthenticated)
			{
				return new ForbidResult();
			}
			else
			{
				return new ChallengeResult();
			}
		}
	}

	var result = await _accountRepository.GetTransactions(filter.BankId, filter.BranchId, filter.AccountId);
	return View(result);
}
The problem
As you can see, we’ve to repeat a lot of boilerplate code to authorize each of the AccountId, BranchId, and BankId resources here. But, this is something we already know from a prior section in which we saw similar logic required to authorize one resource.
The difference here is that because now we have multiple resources in the filter model, there’s a high probability of missing to authorize one of them by the developers, or the developer may authorize them incorrectly.
This simple miss can happen both during the initial implementation of the action or during any future iteration when a new resource property is added to the filter model.
We emphasize on developers making a mistake a lot during this guide but it’s a fact that humans aren’t consistent like machines – we are vulnerable to various external factors that can impact us and impact our consistency, intelligence and focus negatively. We’re subject to emotions and mood swings that impact our positivity and productivity. Especially as developers, we sincerely dislike repetitive, non-creative work. Hence we try to automate such work as much as possible.
The ASPSecurityKit approach
Now let’s see how does the same ListTransaction action look when it’s to be authorized by ADA:
public async Task<IActionResult> ListTransaction(TransactionFilterByModel filter)
{
	var result = await _accountRepository.GetTransactions(filter.BankId, filter.BranchId, filter.AccountId);
	return View(result);
}
You don’t see authorization logic at all! Because what ADA does to authorize one resource, it can do to authorize any number of resources in the request.
And when you add new resource properties to the model, you need not do anything – ADA will take care of authorizing it automatically.
Summary
Thus, regardless of the number of resources to authorize for an action, ADA gives you the same unobtrusive experience – so you only focus on what matters to you and that is the business logic. This also completely eliminates the security overhead involved in catering to urgent change requests to add more filters etc. and you ship with confidence.
Custom Authorization Rules
The ASP.NET approach
If you have a need for custom authorization rules, in ASP.NET you’d either write a policy with its requirement and handler types. Or, you’d put the rules inside the action method itself because you don’t have a need to reuse these rules.
The problem
- If you define a new policy that is very specific for an action, you’re unnecessarily crowding your shared code.
- If you instead choose to keep these rules inside the action itself, you’re violating the principle of separation of concern (SoC) which leads to coupling and convoluted code.
The ASPSecurityKit approach
For the custom authorization rules, ADA lets you define a special method called AuthDefinition (authDef for short). The method looks identical to your action for which you want to implement custom authorization rules, in terms of name and parameters, except that it has an additional permissionCode parameter, and it returns AuthResult as a value.
Consider an action Grant defined in PermitController, that has a parameter of type UserPermit.
public class PermitController : Controller
{
	...
	[HttpPost]
	public async Task<ActionResult> Grant(UserPermit model)
	{
		return this.permitRepository.GrantPermitAsync(model.PermissionCode, model.EntityId);
	}
}
The action is used to grant a new permit to a user. In addition to authorizing that the caller can grant a permit to the specified user, we also need to authorize whether or not the caller herself has a permit to grant the specified permit. So, this is how you can define an AuthDef for Grant action:
public class PermitAuthDefinition : AuthDefinitionBase
{
	public PermitAuthDefinition(AppDbContext dbContext, IEntityIdAuthorizer entityIdAuthorizer)
		: base(dbContext, entityIdAuthorizer)
	{
	}

	public async Task<AuthResult> GrantAsync(UserPermit model, string permissionCode)
	{
		var result = await this.entityIdAuthorizer.IsAuthorizedAsync(permissionCode,
			new { UserPermitId = model.Id, model.UserId, model.UserPermitGroupId });

		if (result.IsSuccess)
		{
			return await this.entityIdAuthorizer.IsAuthorizedAsync(model.PermissionCode, new { model.EntityId });
		}

		return result;
	}
}
The AuthDef GrantAsync above is defined in a class PermitAuthDefinitions, which represents an AuthDef container. A container exactly represents one ASP.NET controller, to define AuthDefs for the actions of that controller.
If you define an AuthDef for an action, ADA executes it instead of performing the regular resource authorization workflow. But, inside an AuthDef method, you can also invoke resource (entityId) authorization just by calling one of the methods of IEntityIdAuthorizer, for the resources or object containing such resources you desire, as we’ve done in above GrantAsync AuthDef.
Summary
Thus, ADA gives you a thoughtfully designed mechanism in the form of AuthDefinitions to write custom authorization rules for actions that need it, saving you from both options – crowd the space of shared, reusable logic with action-specific logic or violate the principle of separation of concern (SoC) by writing the logic in the action itself.
Conclusion
To conclude, with ASP.NET default declarative authorization options (whether role-based, resource-based, etc.), there’s no out-of-the-box way to protect your business data from unauthorized access. Instead, you have to write a lot of repetitive code, which is vulnerable to technically simple yet costly business mistakes, causing security vulnerabilities including but not limited to granting unintended privileges or missing to authorize certain resources leading to potential widespread data leakage. Because the roles and their privileges are hard-coded, they remain hidden from site admins, making it difficult to detect and triage related vulnerabilities on time.
You also need the ever-increasing amount of manual testing and automated tests to verify all paths, more and more code to maintain.
Every change request related to privileges of roles will take more time than it should be because it has to go through full development > testing > deployment cycle, leading to a business that moves slowly resulting in unhappy customers, lost opportunities and fuming management.
You can say that you can optimize it, of course, you can, but that would be embarking on building a security framework of your own, requiring its own tooling, testing, and constant readjustment for every project.
So why reinvent, when ASPSecurityKit is already invented to solve exactly these problems and much more!
ASK gives you highly optimized and battle-tested activity-data authorization (ADA), so you can focus on implementing the business features and not be bothered about authorization.
ASK’s ADA is built on Zero Trust model which means no access by default and automating authorization of both actions and data sent with those actions. You no longer need to write repetitive logic to authorize resources, which considerably shortens the delivery schedule for not just initial development, but also the change requests on existing features. You don’t hard-code roles and their privileges, which empowers site administrators to manage them as per changing business needs. You can cater to urgent requests in record time, meeting deadlines, shipping with confidence like never before and thus wowing the customers and stakeholders.
Credits
- Thanks Kumaran for preparing the source code and other elements used in this guide.
- Thanks Abhilash for preparing the video.
Need help?
Looking for an expert team to build a reliable and secure software product? Or, seeking expert security guidance, security review of your source code or penetration testing of your application, or part-time/full-time assistance in implementation of the complete web application and/or its security subsystem?
Just send an email to [email protected] with the details or call us on +918886333058.