Using the ASPSecurityKit.Tools
In this article
Introduction
ASPSecurityKit.Tools (or ASKTools) is a UI plugin for Visual Studio that comes as a NuGet package. It lets you perform following tasks:
- Install ASPSecurityKit source packages in your projects.
- Generate ASPSecurityKit license keys for your projects
- Update existing license keys.
Prerequisites
- Make sure you have the latest version of the ASPSecurityKit.Tools package. This package comes as a development dependency to ASPSecurityKit package, but the ASKTools would be updated independent of the ASPSecurityKit package. The dashboard API to which it connects, may deny access if the version isn’t recent. Run the following command in Package Manager Console:
update-package ASPSecurityKit.Tools
(you should restart VS after update.)
If you don’t have the package installed, use the following command to install it:
install-package ASPSecurityKit.Tools
- An account on ASPSecurityKit dashboard.
- You also need to have an active subscription to do anything meaningful using the ASKTools. Sign in into the dashboard to buy a subscription, or start here if you don’t have an account.
Install an ASPSecurityKit source package
An ASPSecurityKit source package gives you important security logic in source code form which installs right into your project. You get important security-related web operations out-of-the-box as well as several security components essential in any multi-user web system. To install a source package, follow the below steps:
- Make sure you’ve completed the prerequisites.
- In Visual Studio, open Package Manager Console and select the project in which you want to install the source package. Usually, this will be the main (startup) project of the loaded web application solution. You can later re-organize the source files obtained from the source package into different projects as per the layering you prefer.
- Type the following command and press enter to execute it:
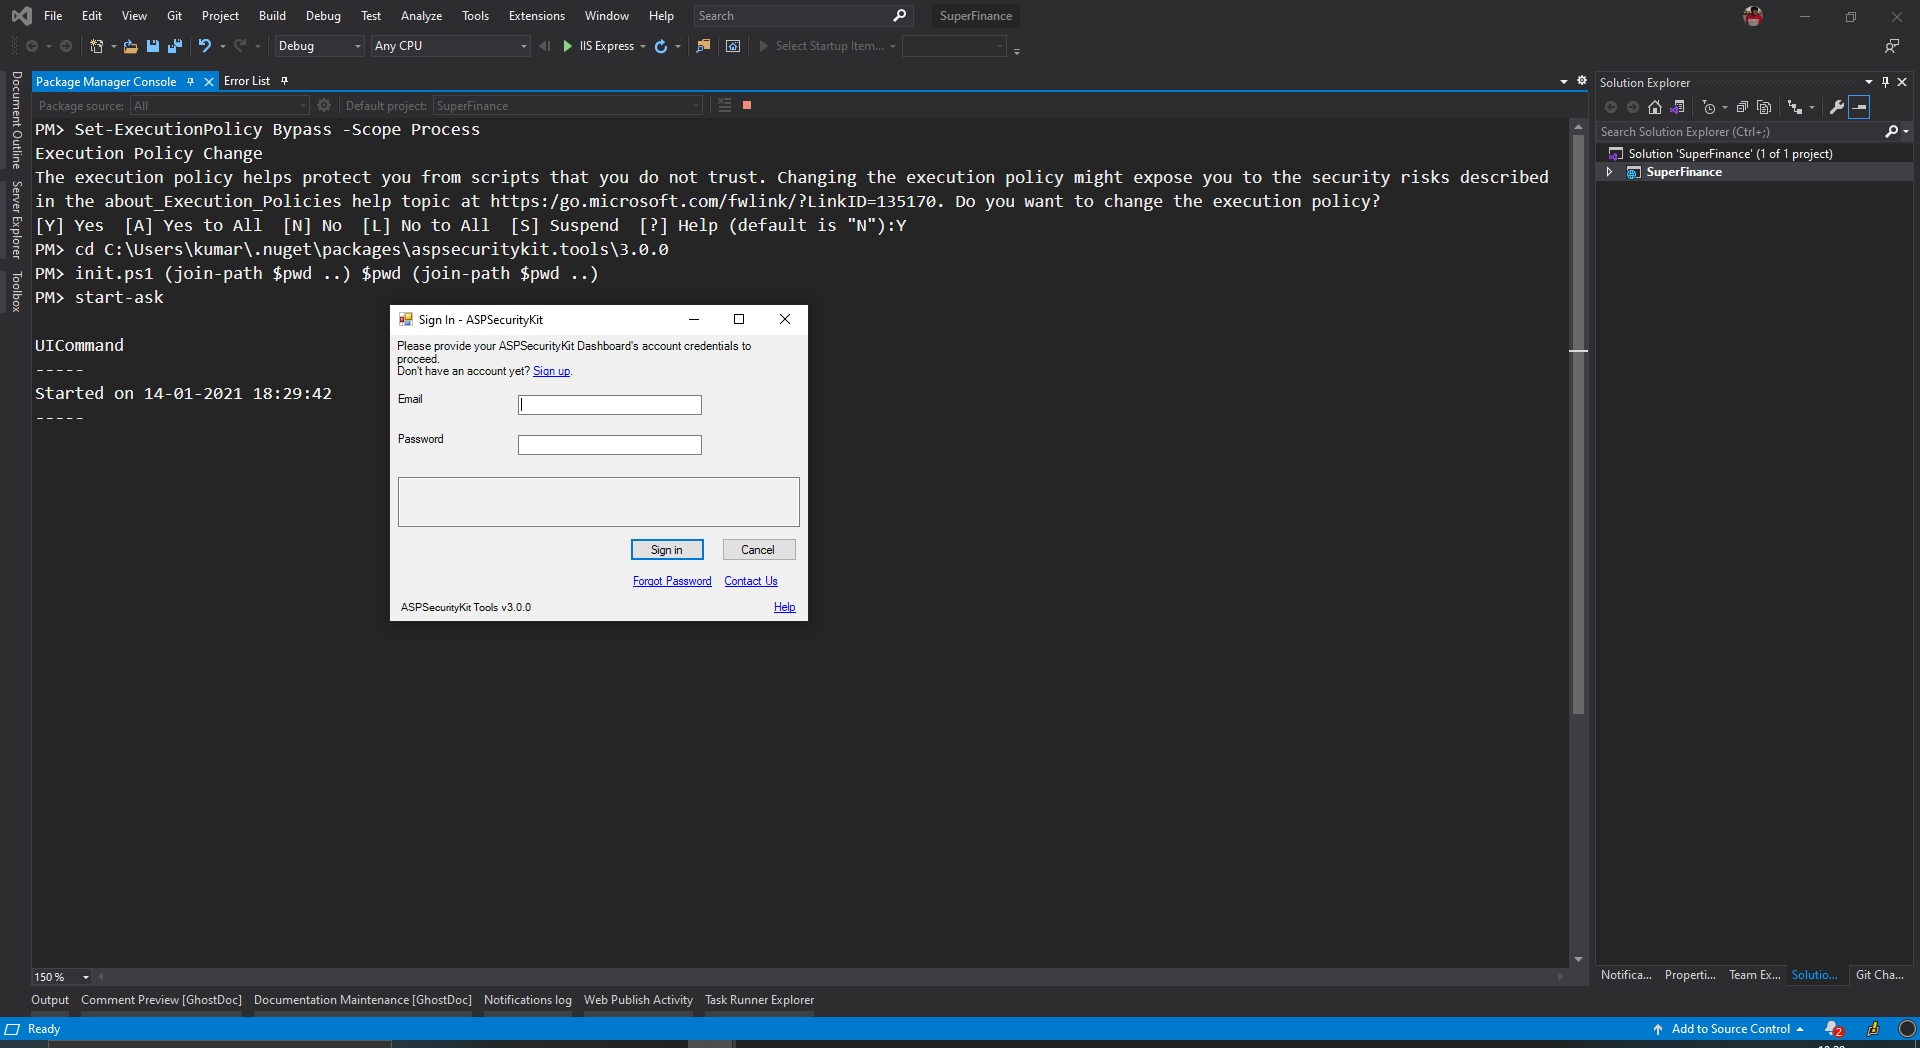
start-ask
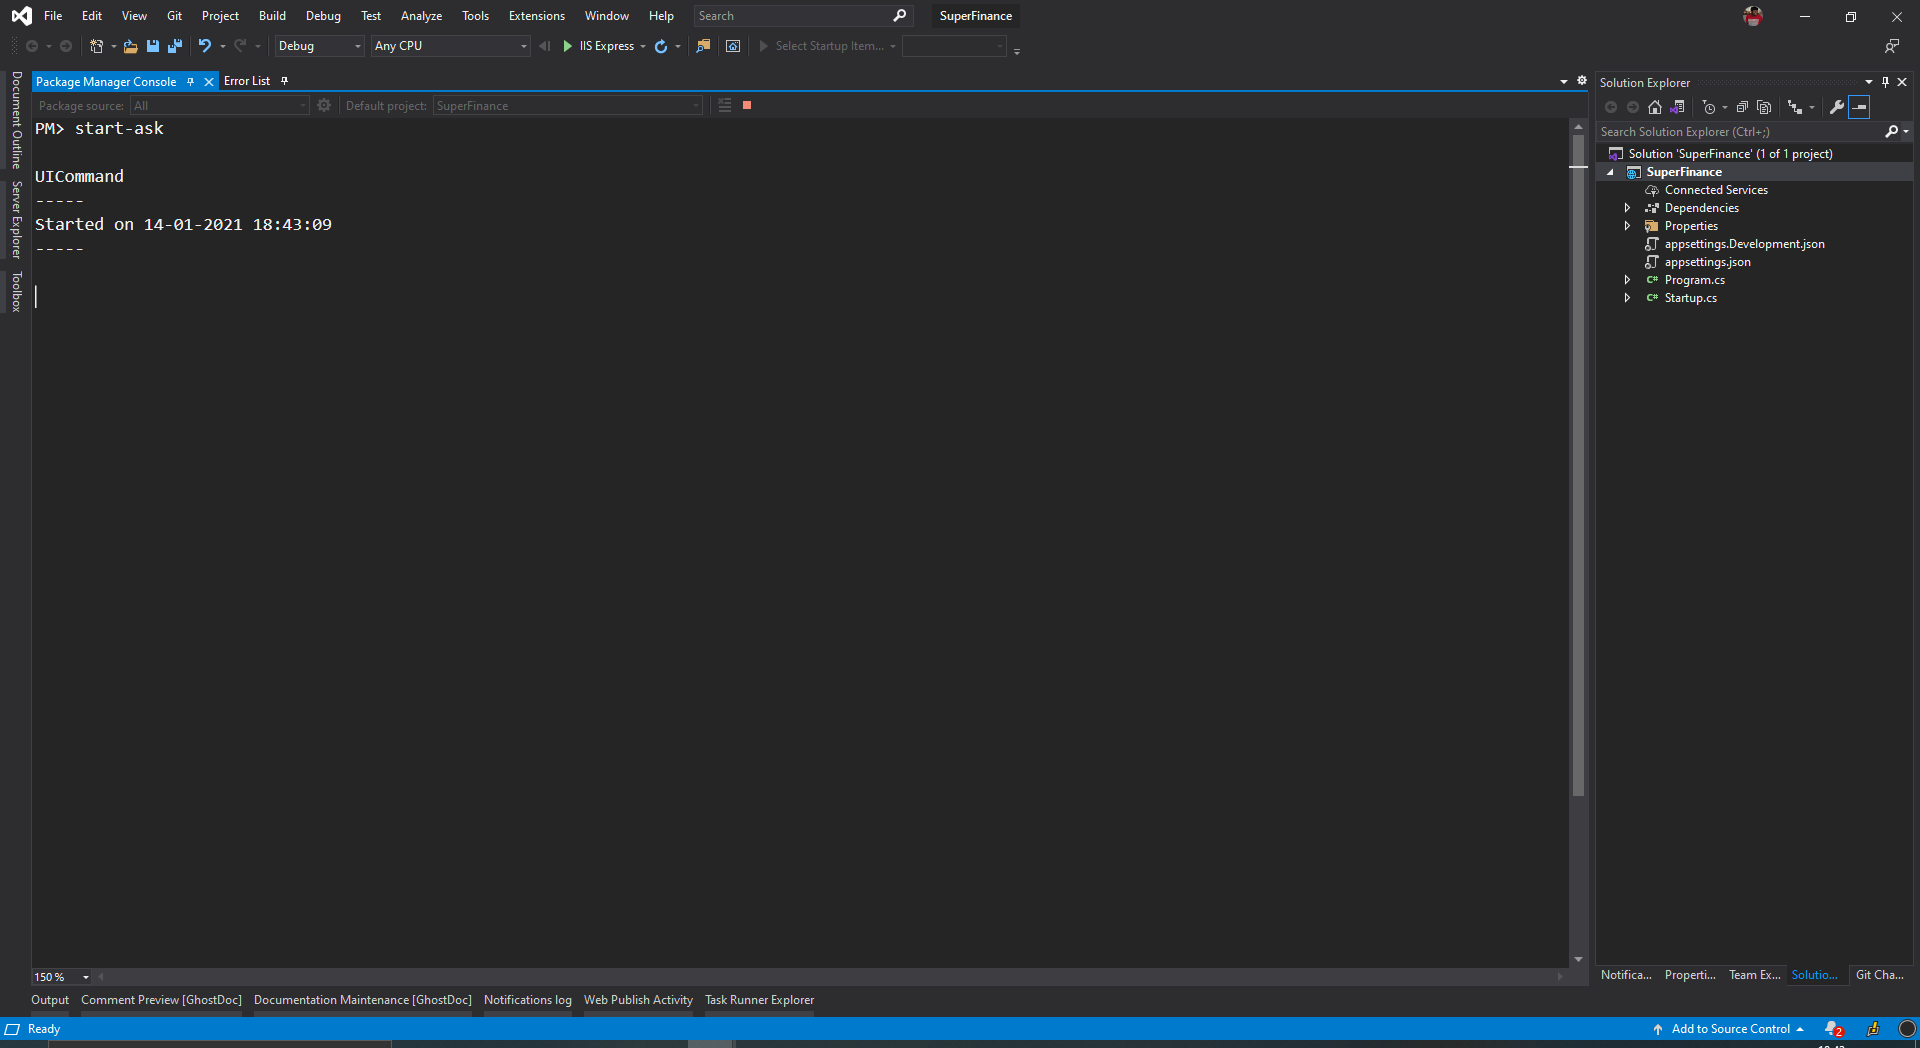
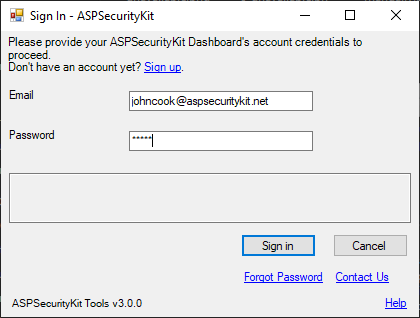
This launches the ASKTools UI with ‘Sign In’ form appearing first. Check out troubleshooting section if it doesn’t.
-
Sign in with your dashboard credentials.
-
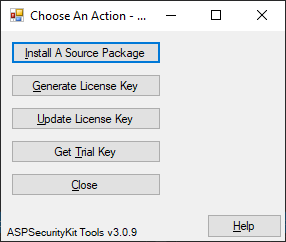
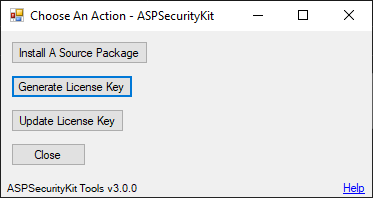
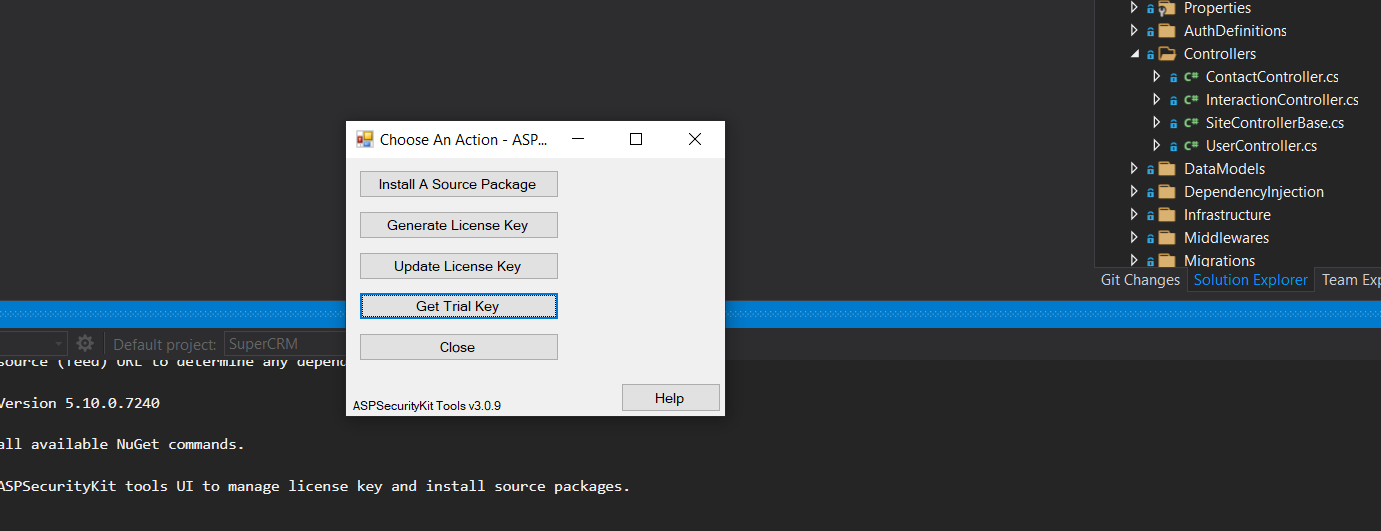
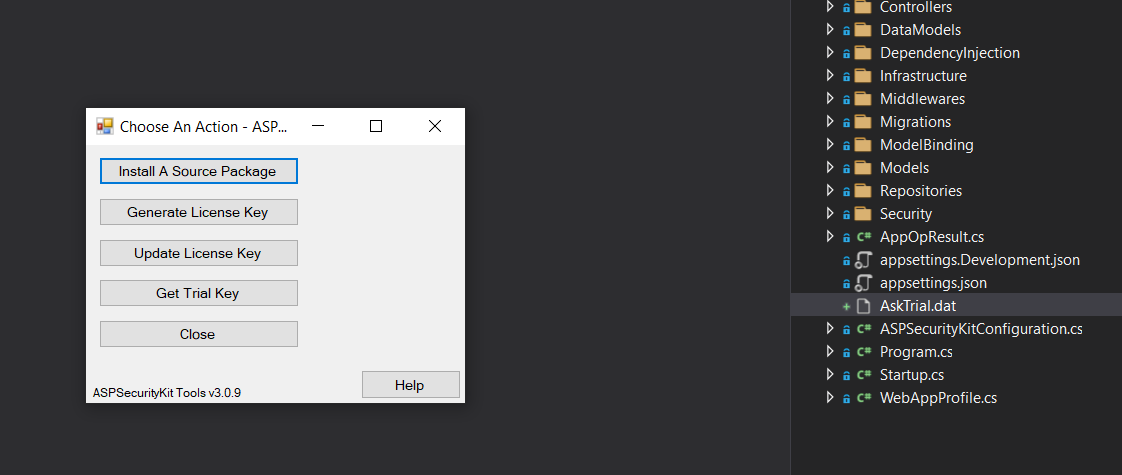
Click on the ‘Install a Source Package’ button on the ‘Choose an Action’ screen.
-
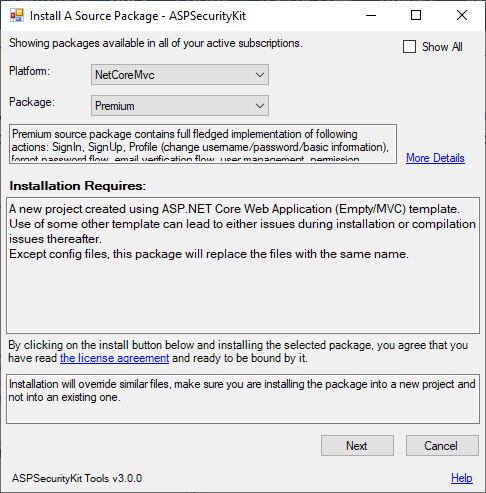
Choose the platform (web framework) of the current project for which you want to install a source package.
-
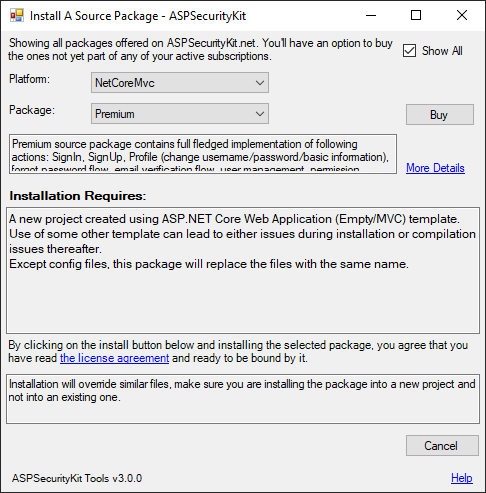
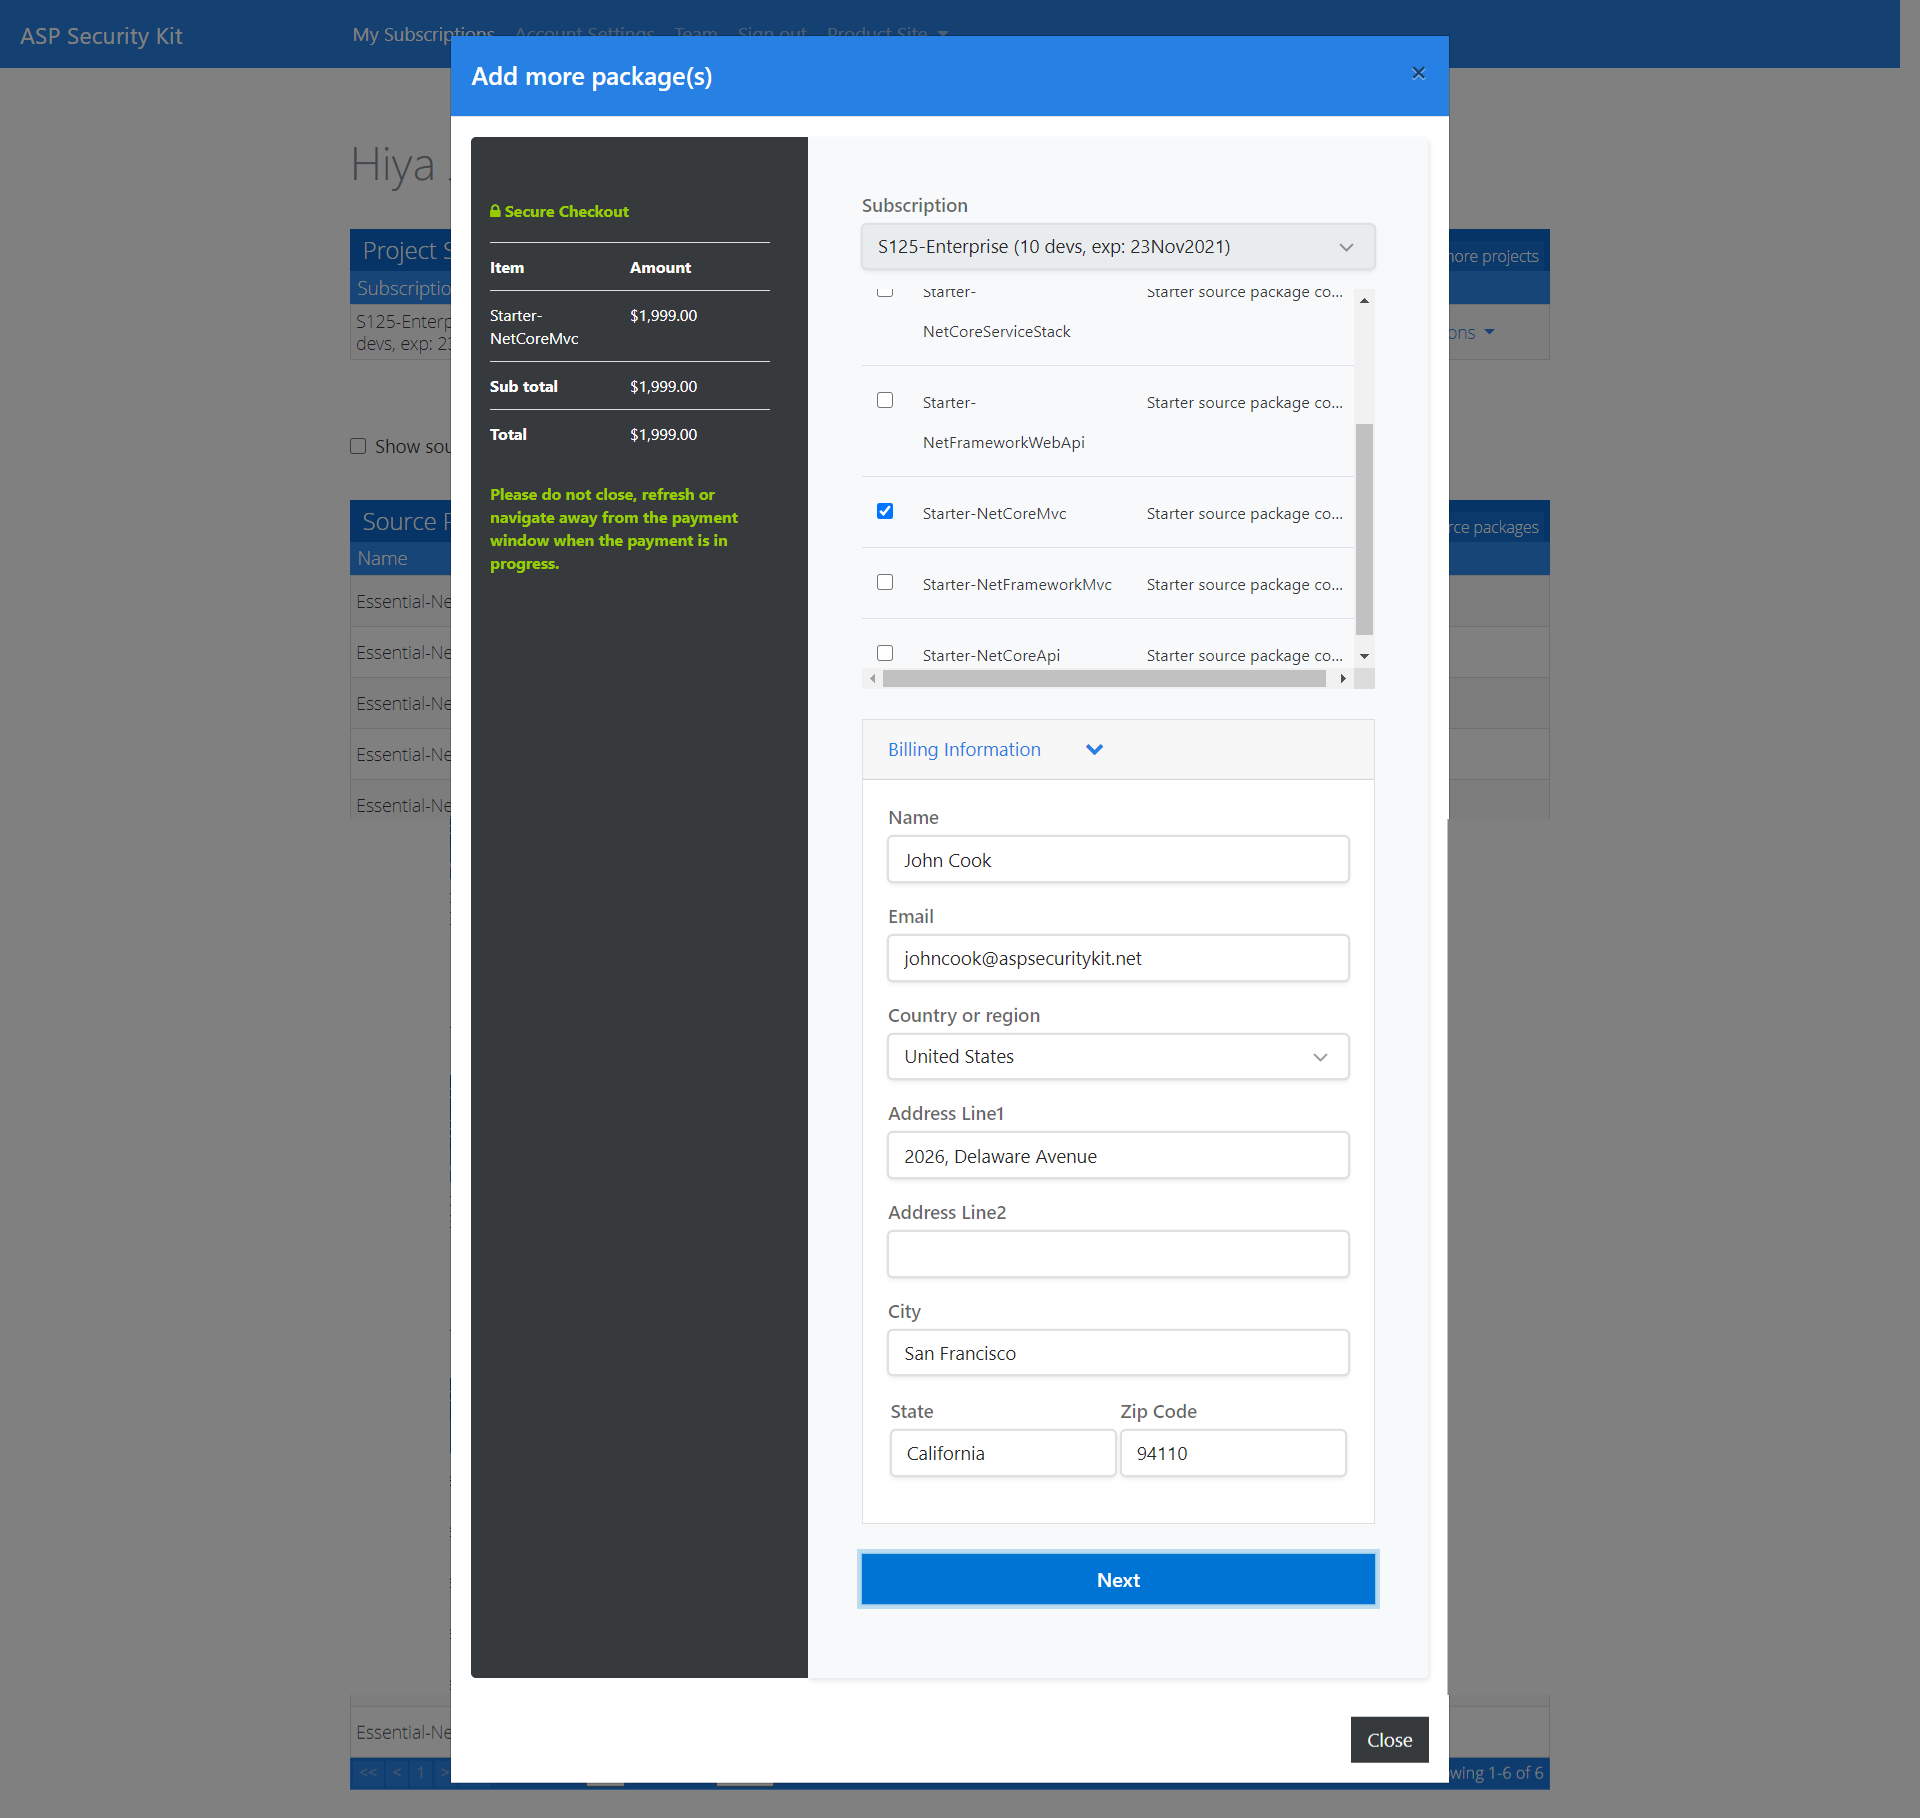
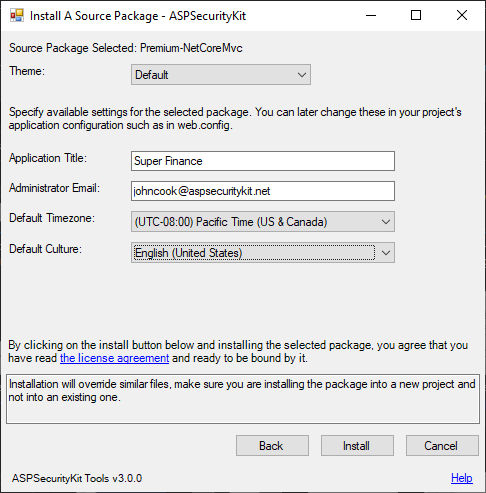
Choose the desired package. If only Essential package appears, it means that you haven’t bought any other package for the chosen platform. You can click on ‘Show All’ check box which will obtain all the packages available in all platforms and you can click on the Buy button appearing next to the package you’re interested to install. This will take you to the Dashboard on the web browser. Complete the purchase there and come back on the ASKTools UI. Close and reopen the ‘Install a Source Package’ screen to refresh the installable packages collection.
-
After choosing the package to install, if the package requires more input to setup (such as application name, [super admin] email, default application timeZone/culture etc.), Next button appears as enabled. Proceed to the next step and provide your input.
-
Read the license agreement and if you agree, click on the Install button.
-
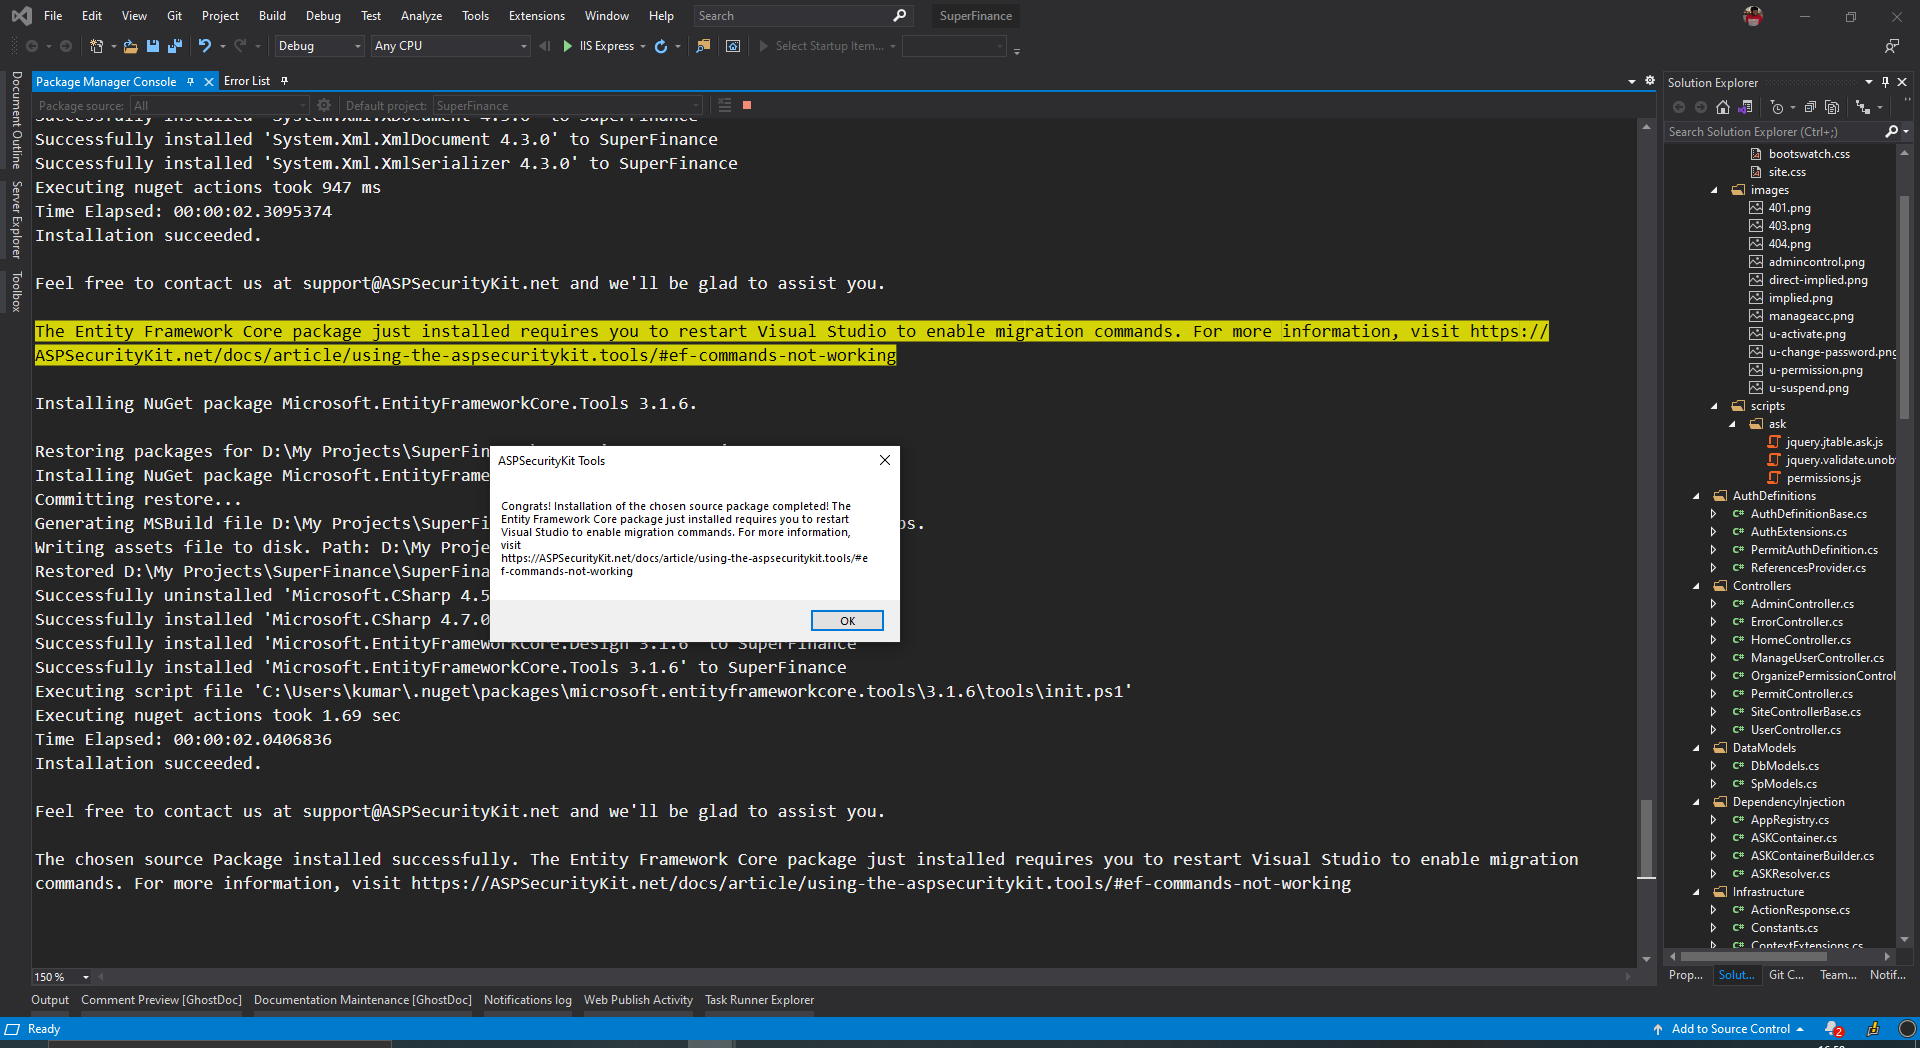
The GUI disappears and you can see the installation progress on the PM Console. Upon completion, you see a message box stating whether or not package installed successfully. Check out troubleshooting section if it does not.
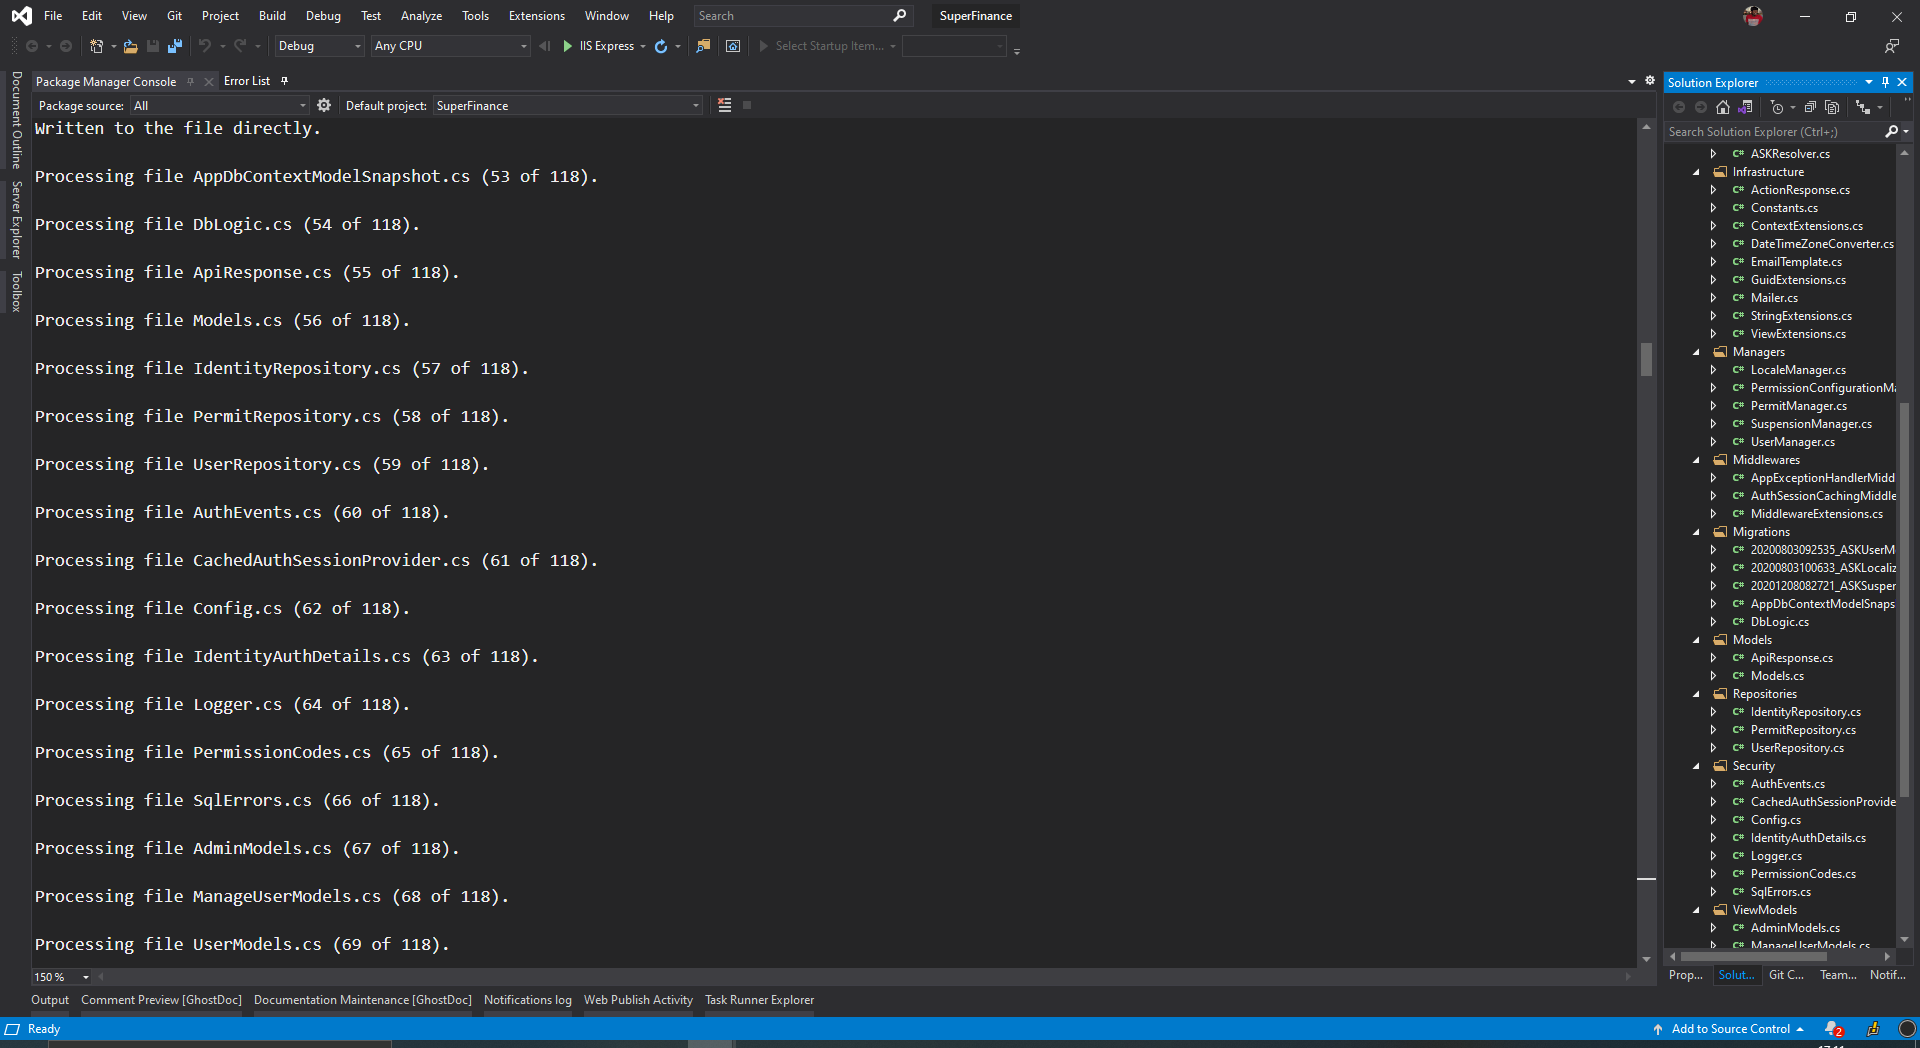
Installation of a source package may involve the following:
- Installing the source files in the package. If a file with the same name exists in the target path, it’ll be overridden.
- Installing/updating NuGet packages.
- Adding/updating configuration in web.config files.
Note: If you’ve installed a source package for ASP.NET Core Mvc, you also need to install some node dependencies.
Install the node dependencies
Source packages for ASP.NET Core platform such as Starter, Premium have some script dependencies such as bootstrap, jquery, jtable, etc. which are configured as NPM dependencies (using package.json). To install those dependencies, and to configure the grunt tasks, do the following:
- Make sure that you have NodeJs and GruntJs installed
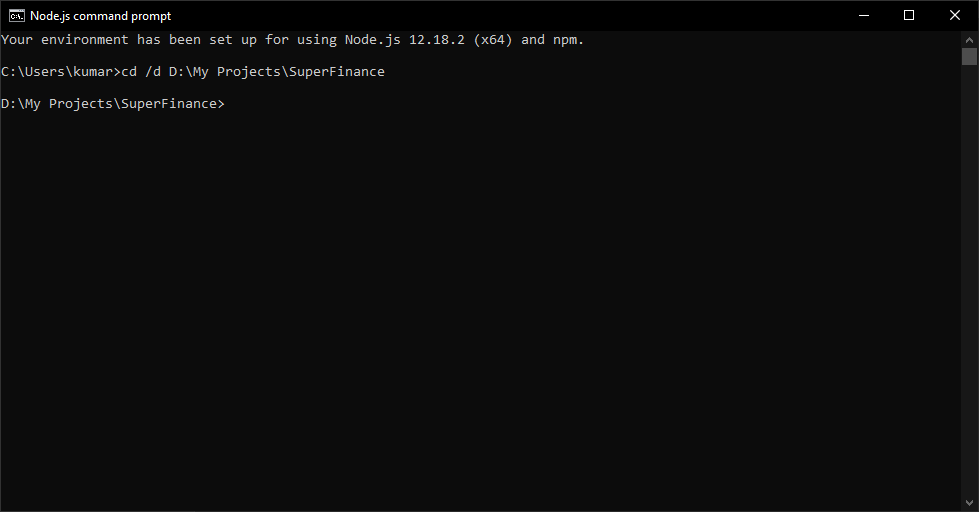
- Open the Node js command prompt and go to the project’s root folder
- Execute the
npm installcommand. This will install dependencies.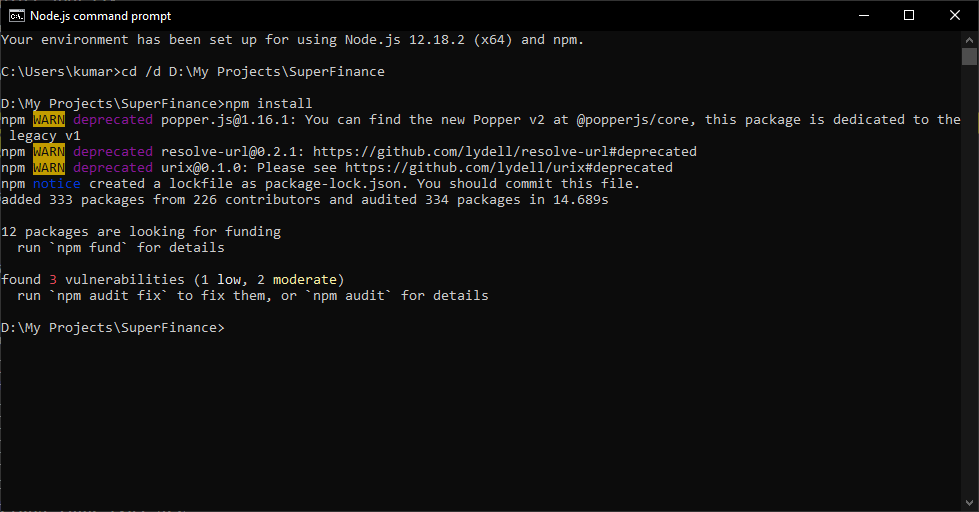
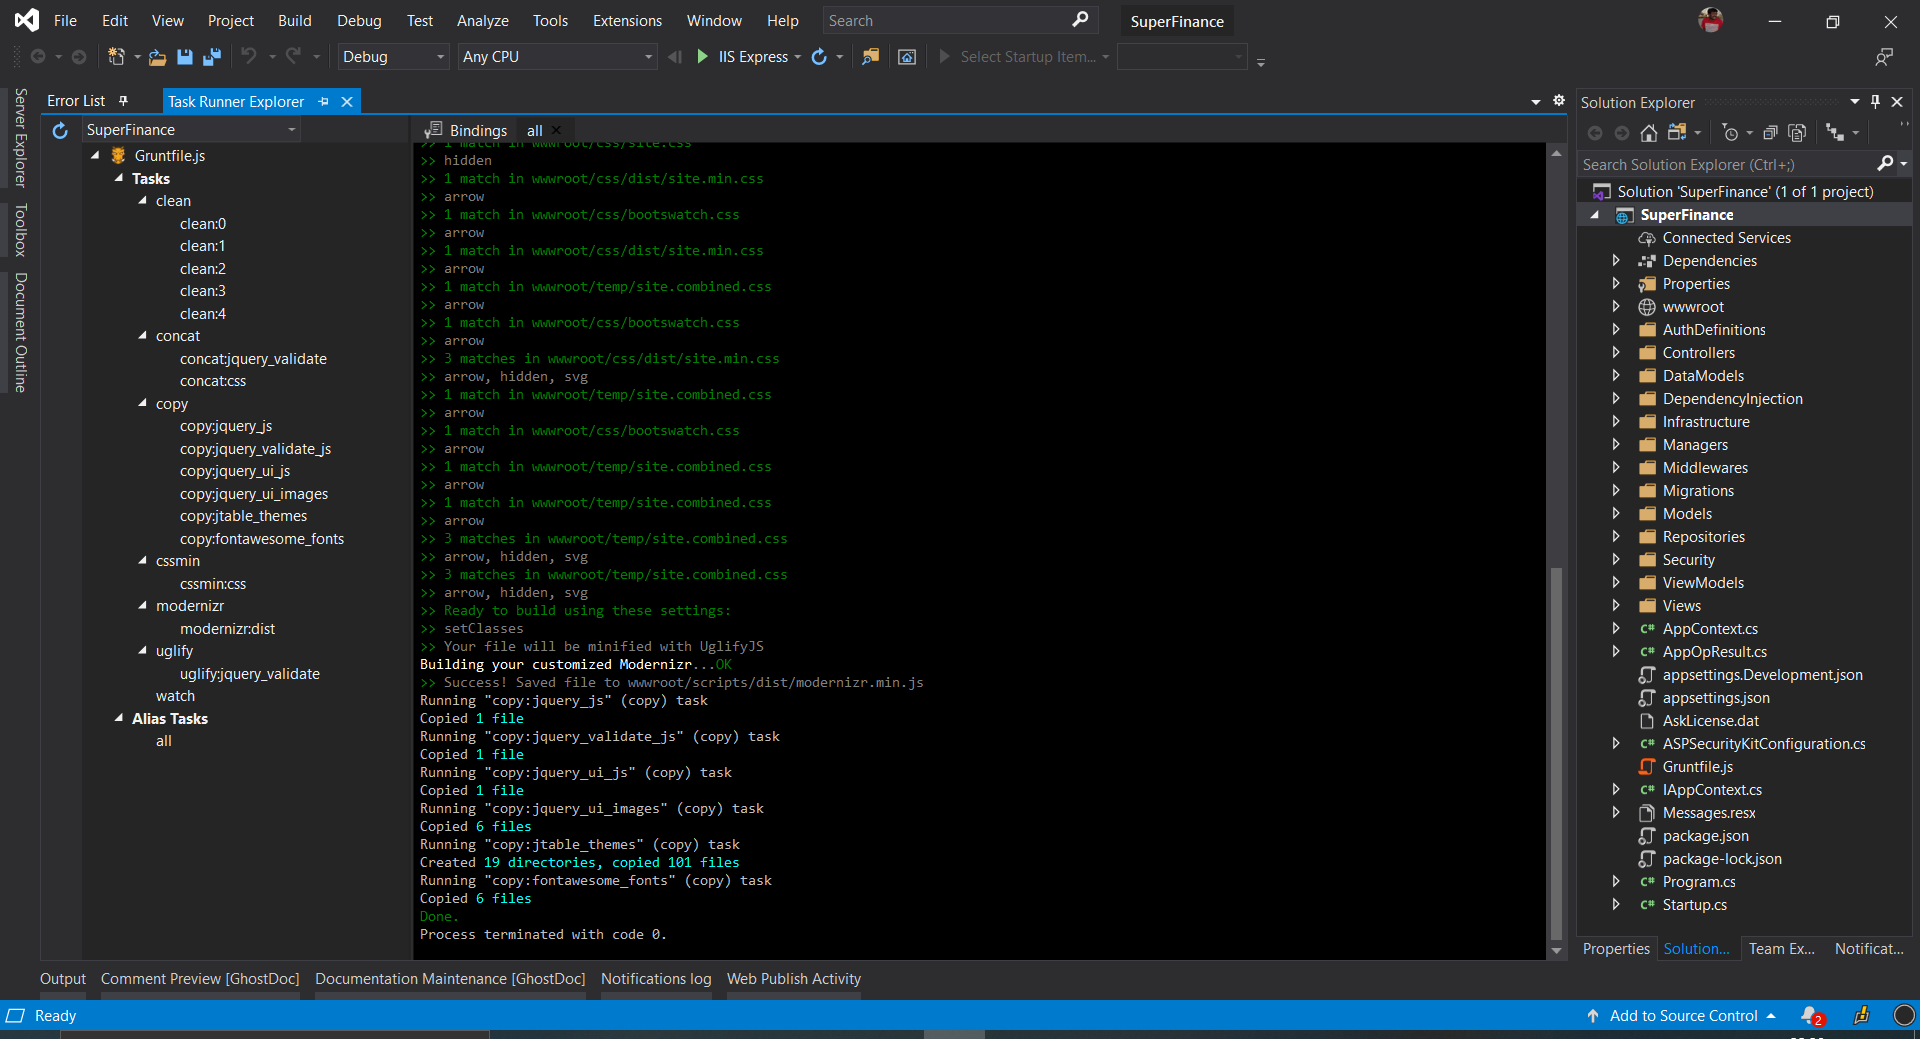
- Upon successful installation, restart the visual studio for the grunt tasks to load.
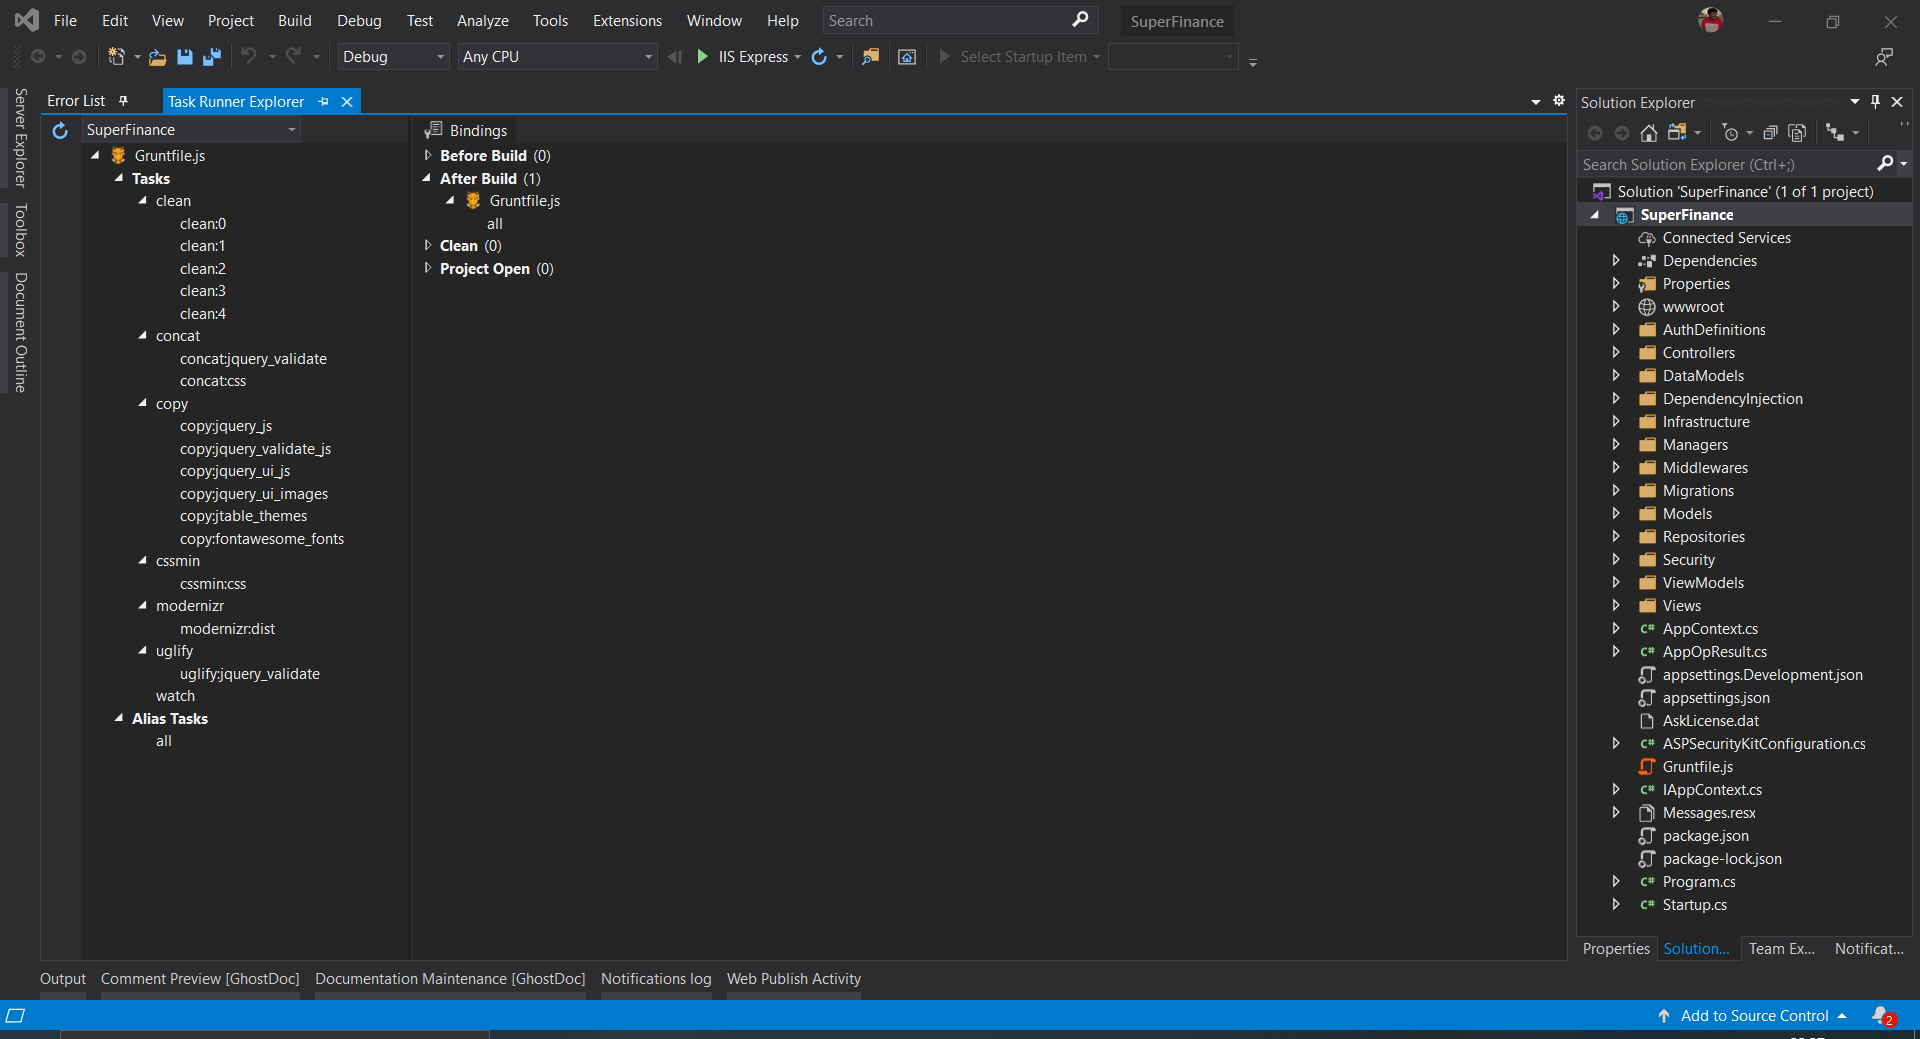
- Upon restart, it’s good to issue rebuild solution command so grunt tasks execute immediately, especially when you’re about to run the project.
When you build the project, these tasks will be executed and required css,js,images assets will be copied to wwwroot folder.
Generate a license key
An ASPSecurityKit license key removes the trial restrictions and is necessary for production deployment. A license key is only valid for the project it’s created. To learn more check out license validity. To generate a license key, follow the below steps:
- Make sure you’ve completed the prerequisites.
- In Visual Studio, open Package Manager Console and select the main (startup) project of the loaded web application solution.
Caution: as specified here, you should only generate license key for the main application project as the license key is bound to the project assembly.
- Type the following command and press enter to execute it:
start-ask
This launches the ASKTools UI with ‘Sign In’ form appearing first. Check out troubleshooting section if it doesn’t.
-
Sign in with your dashboard credentials.
-
Click on the ‘Generate License Key’ button on the ‘Choose an Action’ screen. The ‘Generate License Key’ dialog appears.
-
Make following selections:
- Choose the subscription which applies on this project. Basically choose the one which has the necessary number of developer licenses matching or exceeding number of developers to work on this project. You can also add more developer licenses to the subscription later as the team grows.
If no subscription appears in the dropdown, indicates that either you have not bought any subscription yet, or have already consumed them in other projects. In any case, you can click on ‘Buy More’ button which takes you to the dashboard on the web browser and lets you buy a new ASPSecurityKit subscription. - Choose the platform (web framework) of the current project for which you want to generate the license. The generated license allows mix use; i.e., license generated for ASP.NET Mvc will also be valid for ASPSecurityKit’s ASP.NET Web Api package and vice versa.
- Click on the Generate button.
Warning: Once generated, the license key cannot be revoked, so make sure you select the right project and its platform.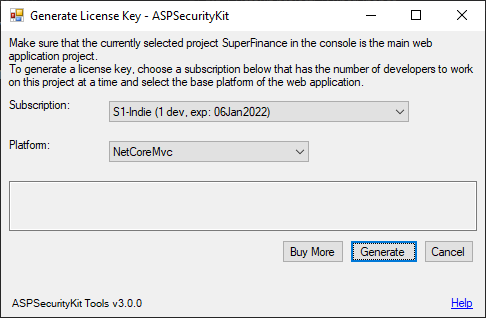
- Choose the subscription which applies on this project. Basically choose the one which has the necessary number of developer licenses matching or exceeding number of developers to work on this project. You can also add more developer licenses to the subscription later as the team grows.
-
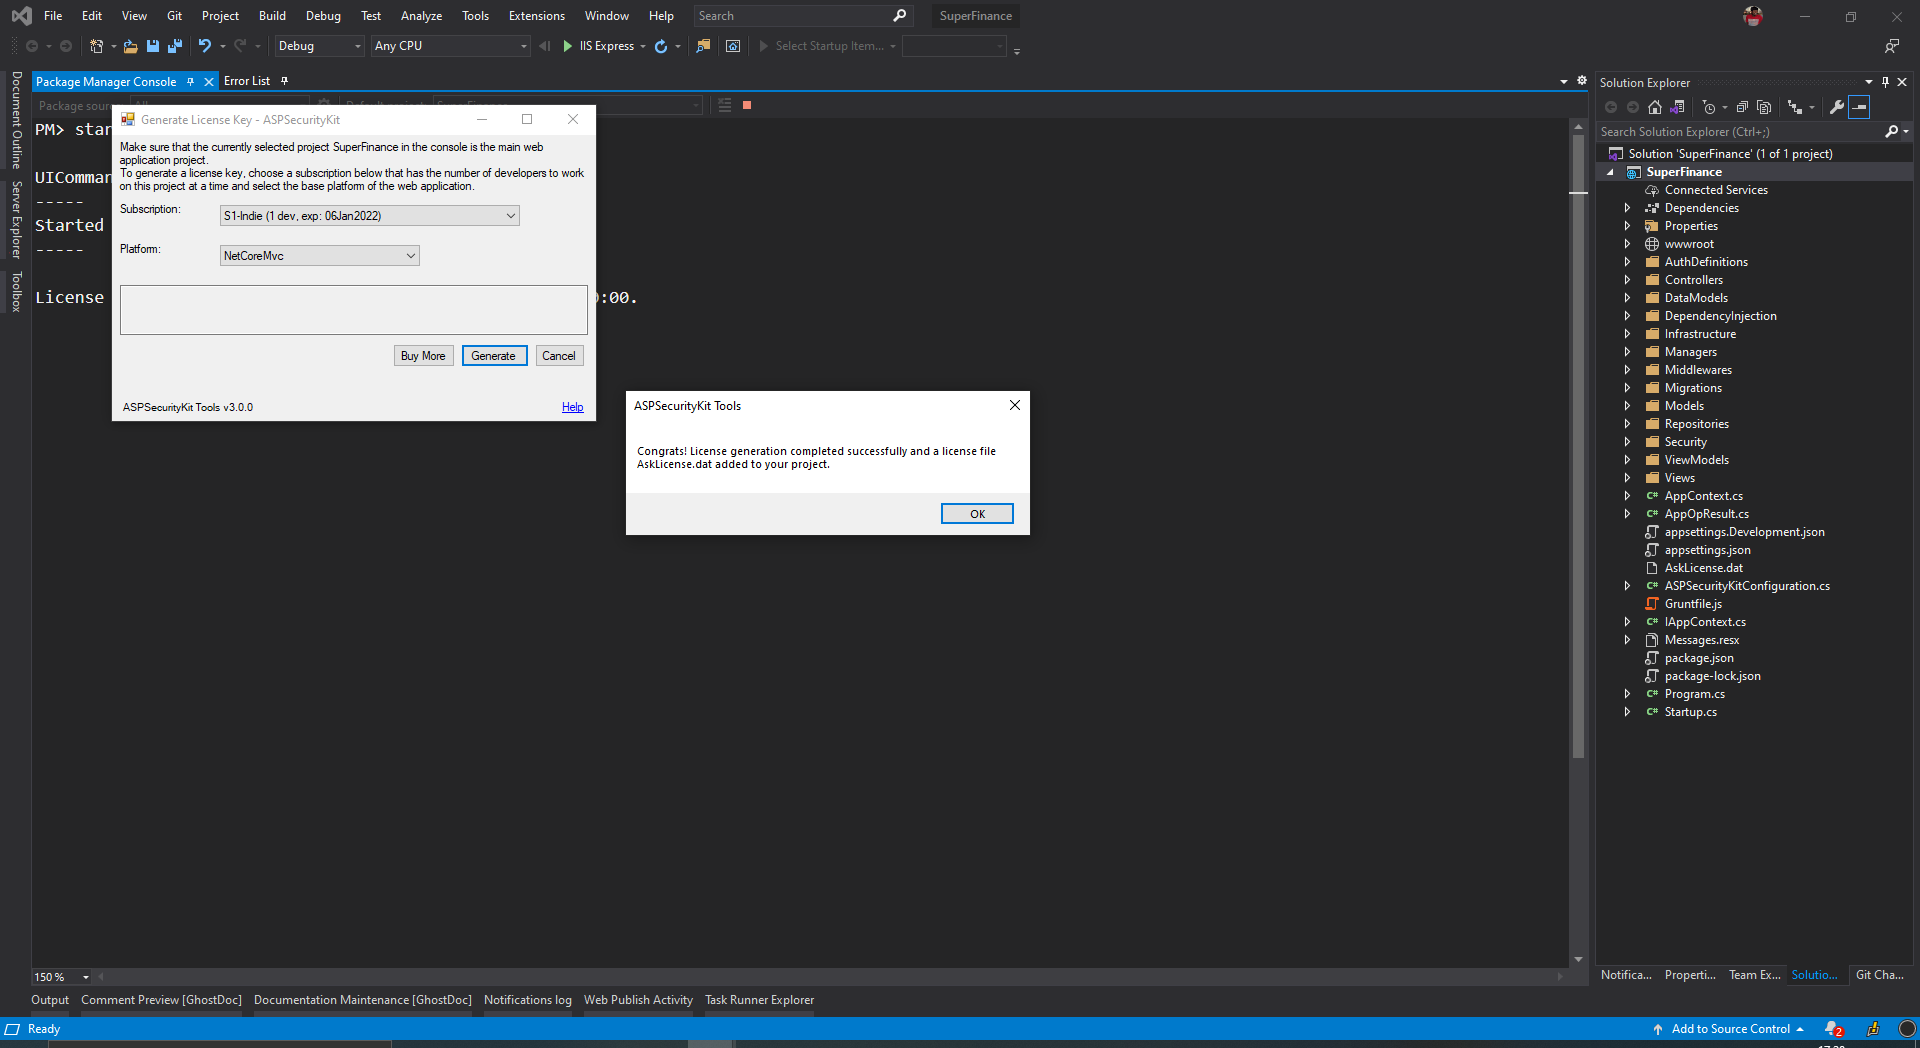
If all goes well, a license key is generated and saved in a file named AskLicense.dat in the project root. If there’s any issue saving the license data to the file, the same would be displayed in a textbox on the screen which you can copy and save it yourself. In case of an error, examine the logs for more details.
To help with any issue, contact us at [email protected].
Re-generate (update) a license key
For the reasons stated here, you may need to update existing license key.
There are two ways to update:
1. The update-askLicense Powershell command
- In Visual Studio, open Package Manager Console and select the project having the license key file.
Important: The license key file must be in the root directory of the project.
- Type the following command and press enter to execute it:
update-askLicense
* If the license key file is named other than AskLicense.dat, you can specify the same using -LicenseFileName (-lf) argument as follows:
update-askLicense -lf ASPSecurityKitLicenseKey.dat
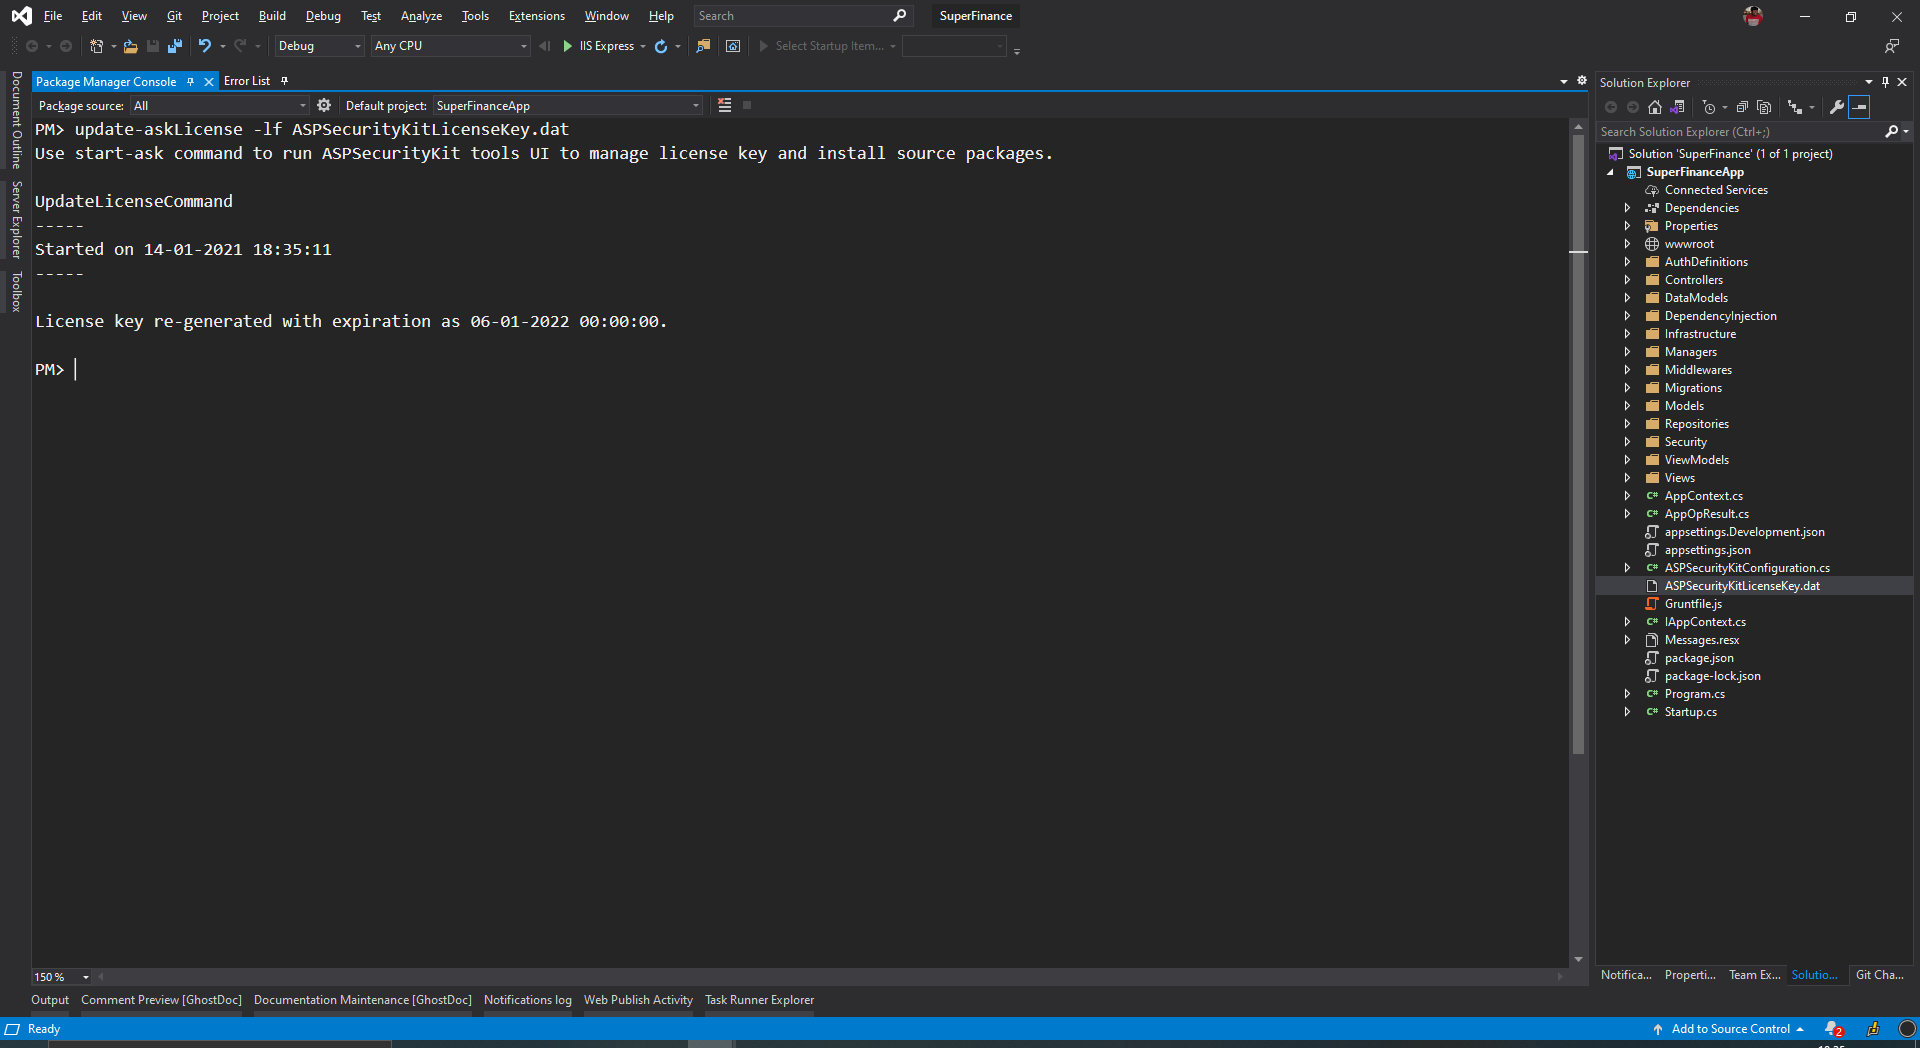
- If all goes well, the license key file is updated. Otherwise, you should see an appropriate error message. Examine the logs for more details.
2. The update license UI
- In Visual Studio, open Package Manager Console and select the project having the license key file.
Important: The license key file must be in the root directory of the project.
- Type the following command and press enter to execute it:
start-ask
This launches the ASKTools UI with ‘Sign In’ form appearing first. Check out troubleshooting section if it doesn’t.
-
Sign in with your dashboard credentials.
-
Click on the ‘Update License Key’ button on the ‘Choose an Action’ screen. The ‘Update License Key’ dialog appears.
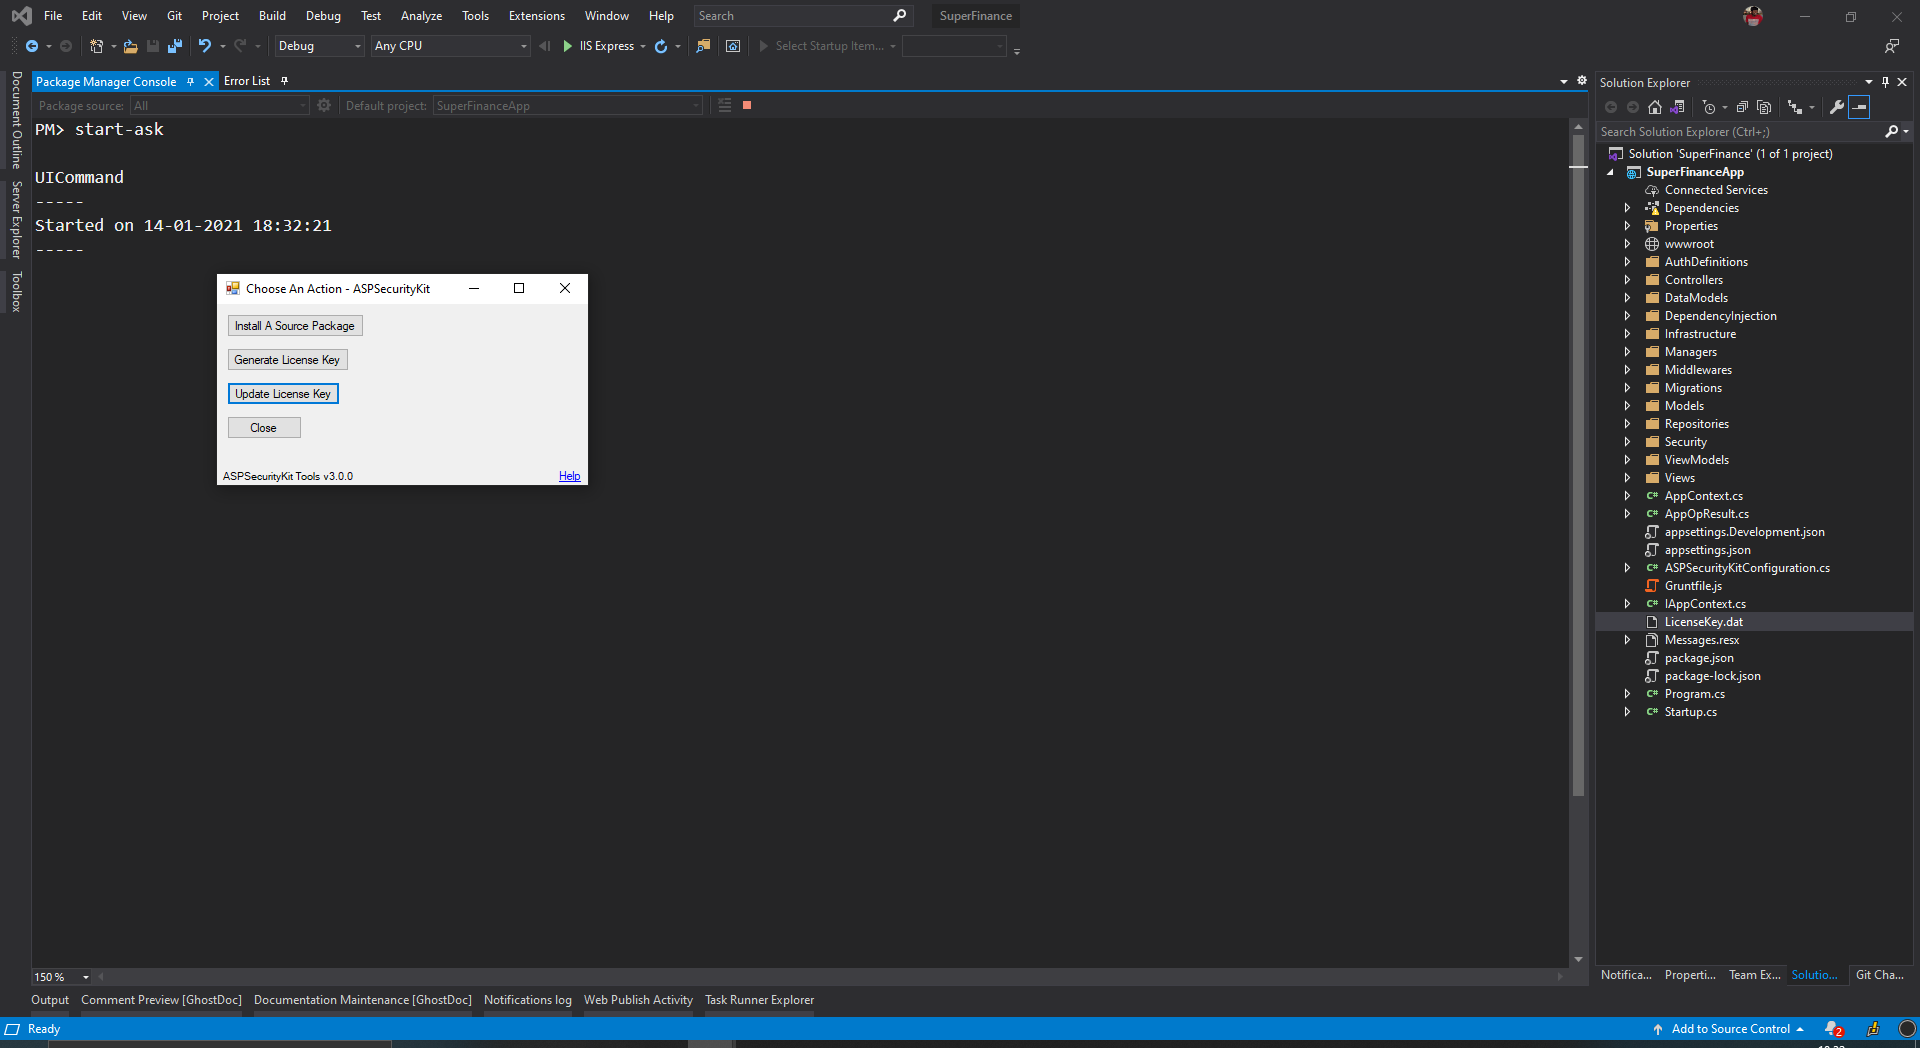
-
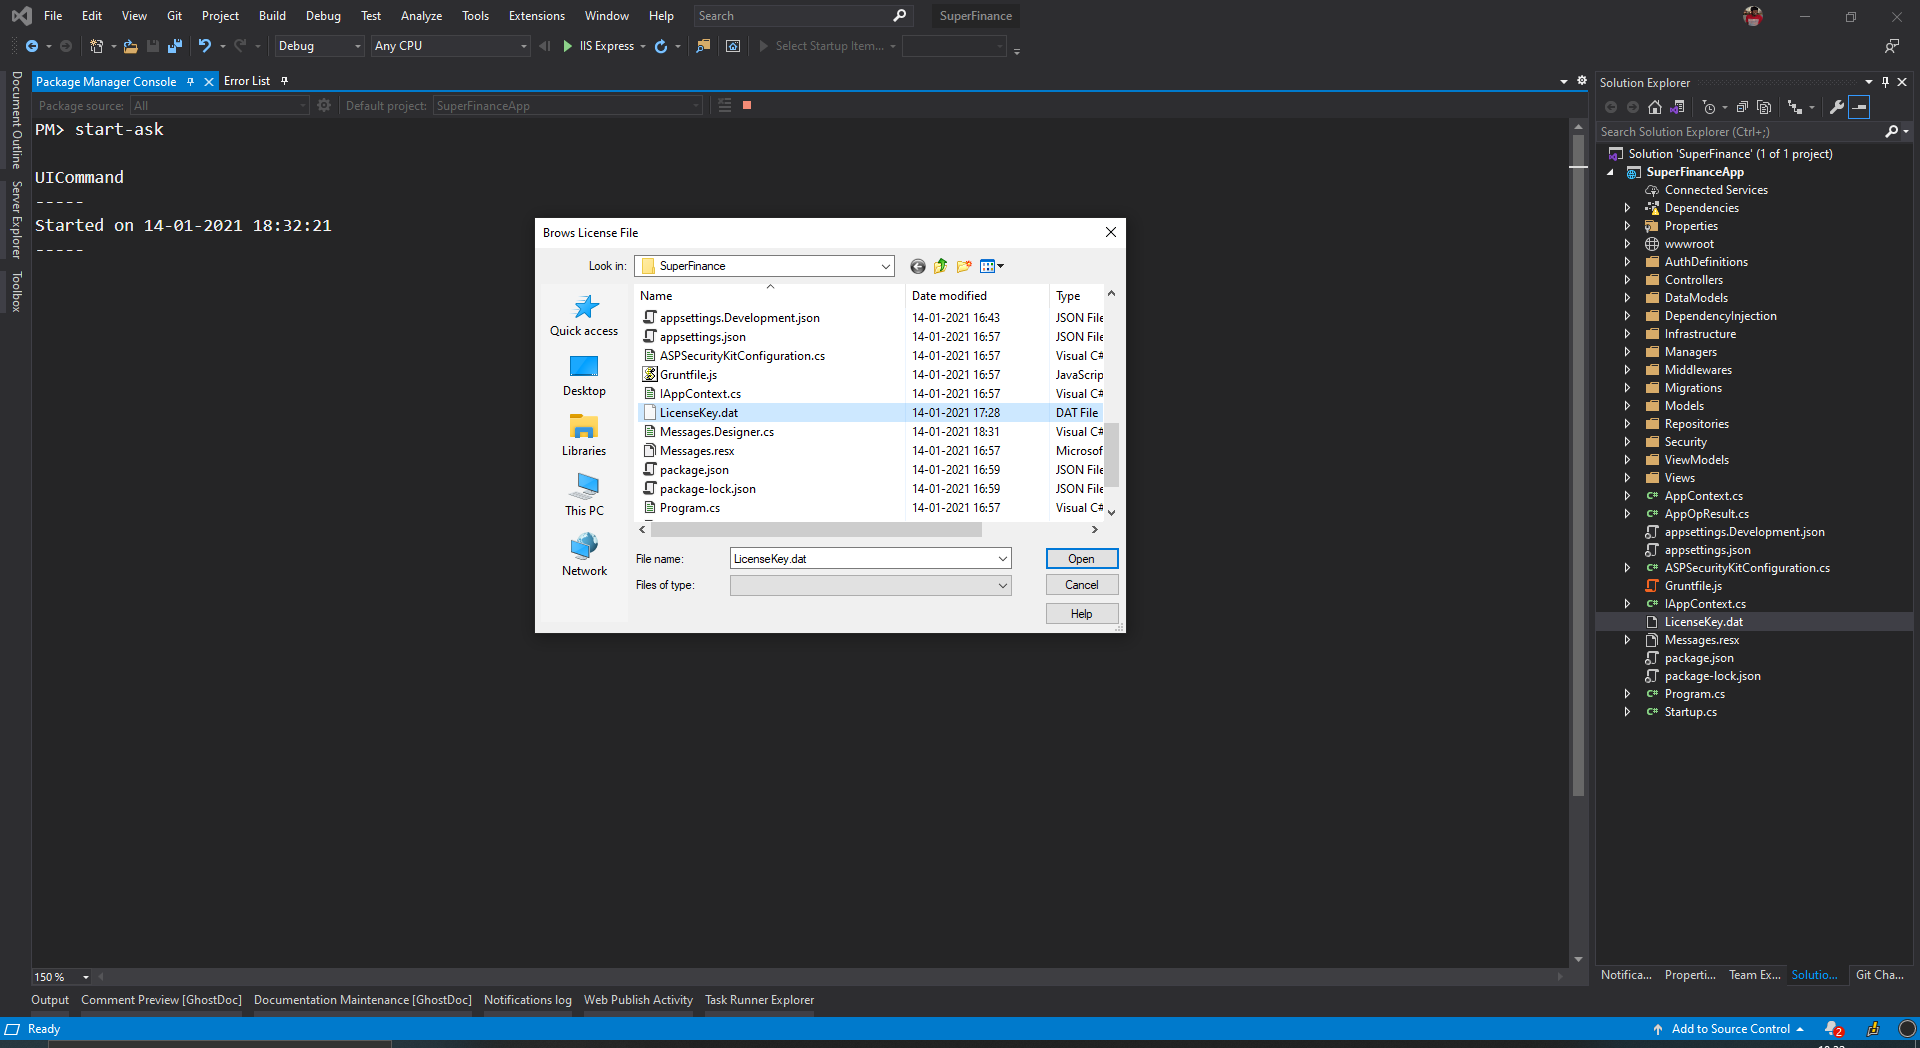
If the license key file with the name AskLicense.dat is not found, you are prompted to locate the same via a ‘Browse License File’ dialog.
-
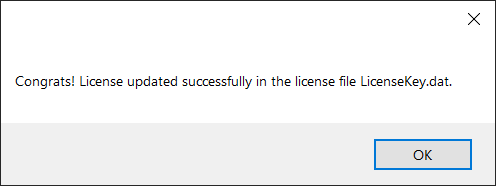
If all goes well, the license key file is updated. If there’s any issue saving the license data to the file, the same would be displayed in a textbox on the screen which you can copy and save it yourself. In case of an error, examine the logs for more details.
To help with any issue, contact us at [email protected].
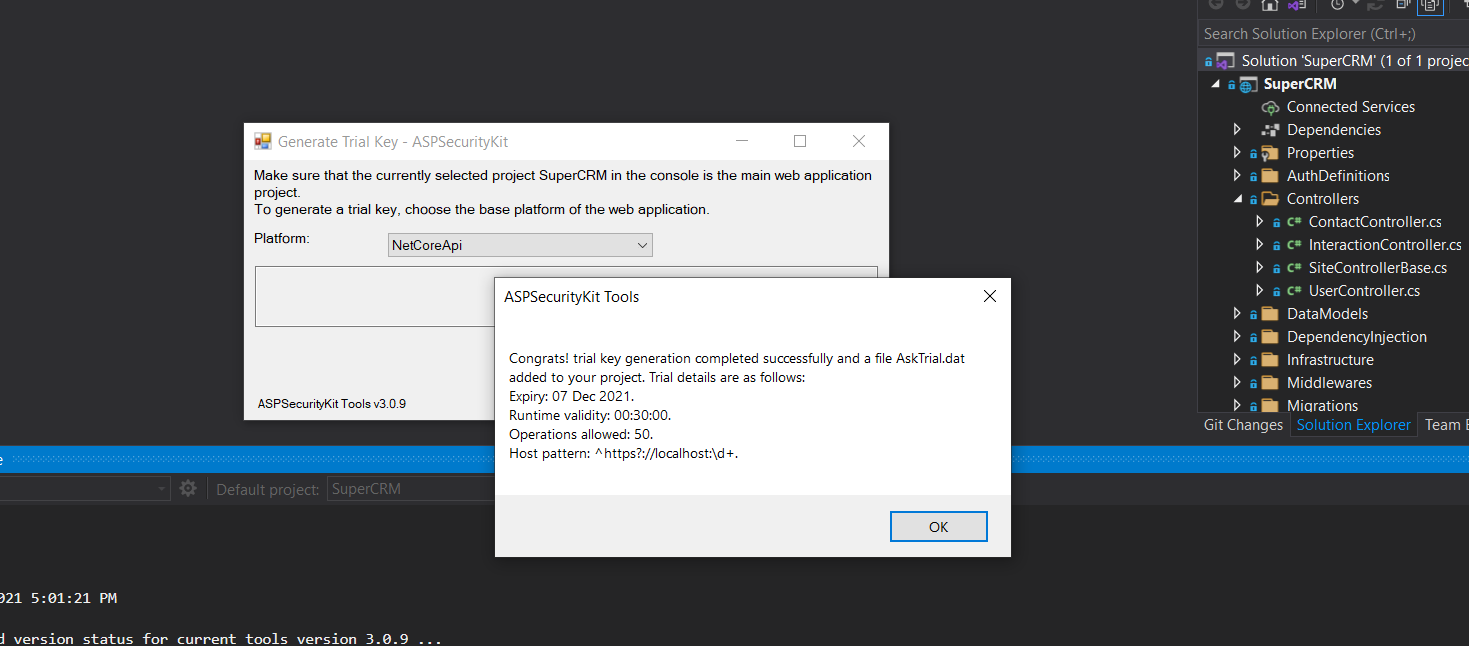
Generate a trial key
An ASPSecurityKit trial key gives you additional relaxations over the default restrictions. This aids in trying out ASPSecurityKit with getting started and similar tutorials that need more operations than what’s permitted with the default restrictions. Upon generation of the trial key, the actual restrictions it carries are shown to you:
To generate a trial key, follow the below steps:
- Make sure you’ve completed the prerequisites.
- In Visual Studio, open Package Manager Console and select the main (startup) project of the loaded web application solution.
Caution: as specified here, you should only generate a key for the main application project as the key is bound to the project assembly.
- Type the following command and press enter to execute it:
start-ask
This launches the ASKTools UI with ‘Sign In’ form appearing first. Check out troubleshooting section if it doesn’t.
-
Sign in with your dashboard credentials.
-
Click on the ‘Get Trial Key’ button on the ‘Choose an Action’ screen. The ‘Get Trial Key’ dialog appears.
-
Make following selections:
- Choose the platform (web framework) of the current project for which you want to generate the trial key. The generated key allows mix use; i.e., trial key generated for ASP.NET Mvc will also be valid for ASPSecurityKit’s ASP.NET Web Api package and vice versa.
- Click on the Generate button.
Warning: Once generated, the trial key cannot be revoked, so make sure you select the right project and its platform.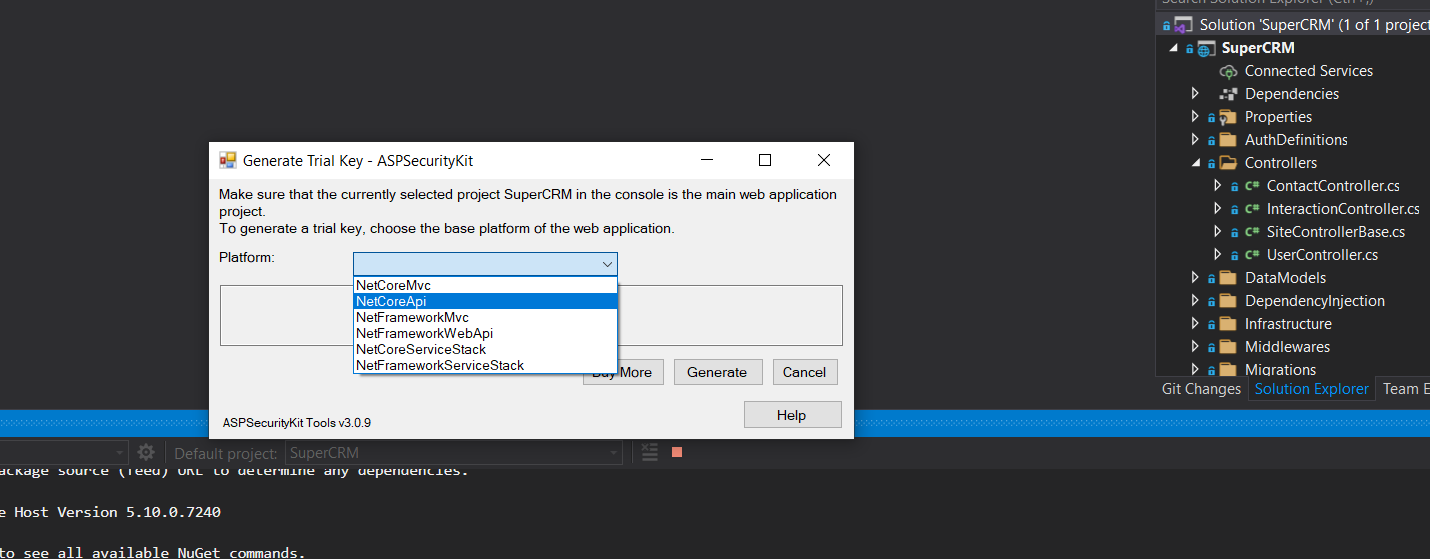
-
If all goes well, a trial key is generated and saved in a file named AskTrial.dat in the project root. If there’s any issue saving the key data to the file, the same would be displayed in a textbox on the screen which you can copy and save it yourself. In case of an error, examine the logs for more details.
Caution: As of this writing, there’s a limit on number of trial keys that can be generated per user. You’ll receive an error if you attempt to generate a trial key if you’ve reached this limit.
To help with any issue, contact us at [email protected].
Troubleshooting
Important: All ASKTools commands write diagnostic information in a log file situated inside the ASPSecurityKit.Tools package folder.
- For .NET Core projects, this will be in the shared packages directory like ‘C:\Users\<username>\.nuget\packages\aspsecuritykit.tools\3.0.0\log.txt’ (make sure the PC username and ASPSecurityKit.Tools package version is as per your machine and project).
- For .NET Framework projects, this will be like ‘<path-to-your-solution>\packages\ASPSecurityKit.Tools-3.0.0\log.txt’ (Make sure you choose the version of ASPSecurityKit.tools as the one installed in the desired project if there are multiple versions).
For any issue not covered in the below sections, feel free to send us the details with logs (if any) at [email protected] and we’ll be glad to help.
Issues with start-ask command
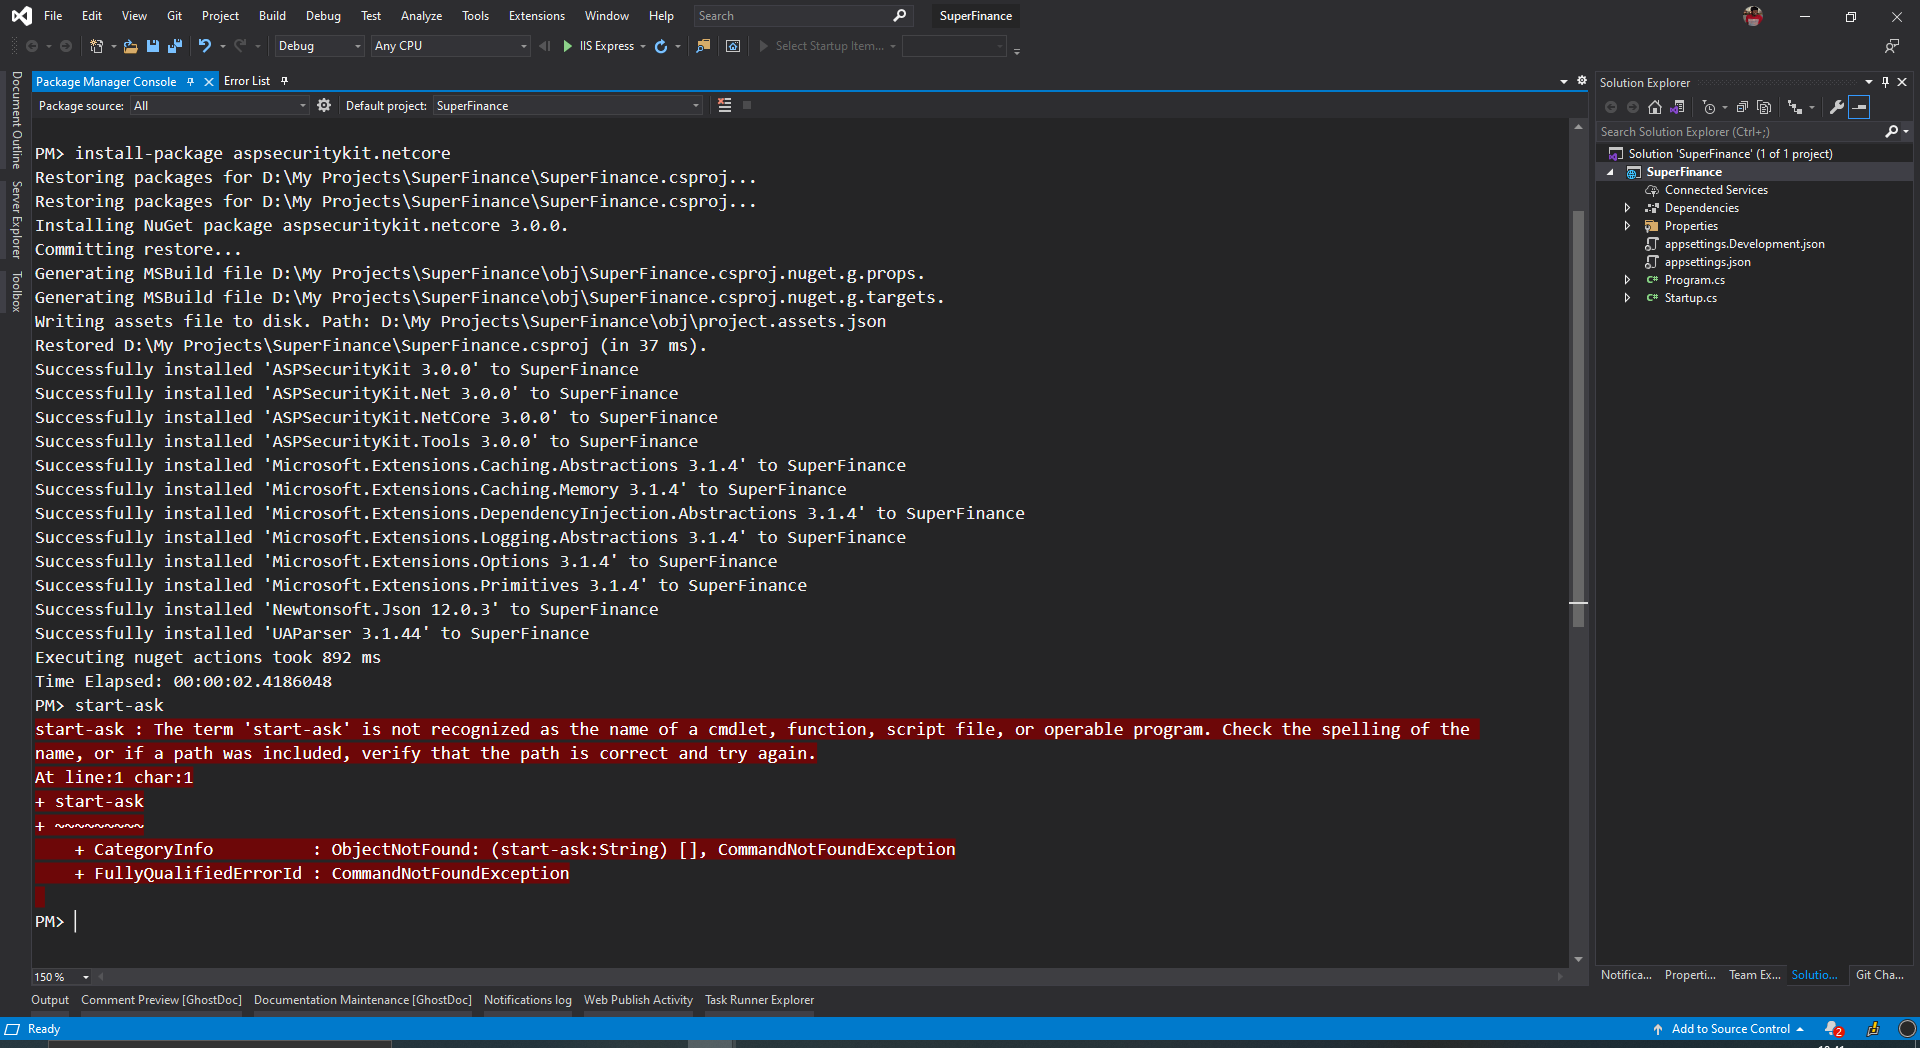
The term start-ask is not recognized as the name of a cmdlet, function, script file, or operable program.
This indicates that either the ASPSecurityKit.Tools package isn’t installed, or the Powershell script init.ps1 didn’t run. Try the following:
- In PM console, select the target project and then run
install-package ASPSecurityKit.Toolscommand. If the reported message indicates that the package is already installed, try the next step. Otherwise, trystart-askcommand again. - The
start-askcommand is added by ASKToolsinit.ps1Powershell script. This script is executed by PM Console when you install the package and every time you open the solution in Visual Studio. However, if the script fails to run, you don’t get the command. You can try running the script manually. - You can also check execution policy with the command
get-executionPolicy. If it’s anything other thanunrestricted, theinit.ps1may not run automatically. Checkout how to enable Powershell script execution.
Init.ps1 cannot be loaded because the execution of scripts is disabled.
This indicates that your administrator has either disabled execution of Powershell scripts or the setting is restricted to allow only signed scripts or something. You can try the following to enable execution for only the currently running Visual Studio process:
- In the PM Console, run the following command (hint: you can copy and paste it) and press ‘y’ to confirm. Make sure that the command did not throw any error.
Set-ExecutionPolicy Bypass -Scope Process
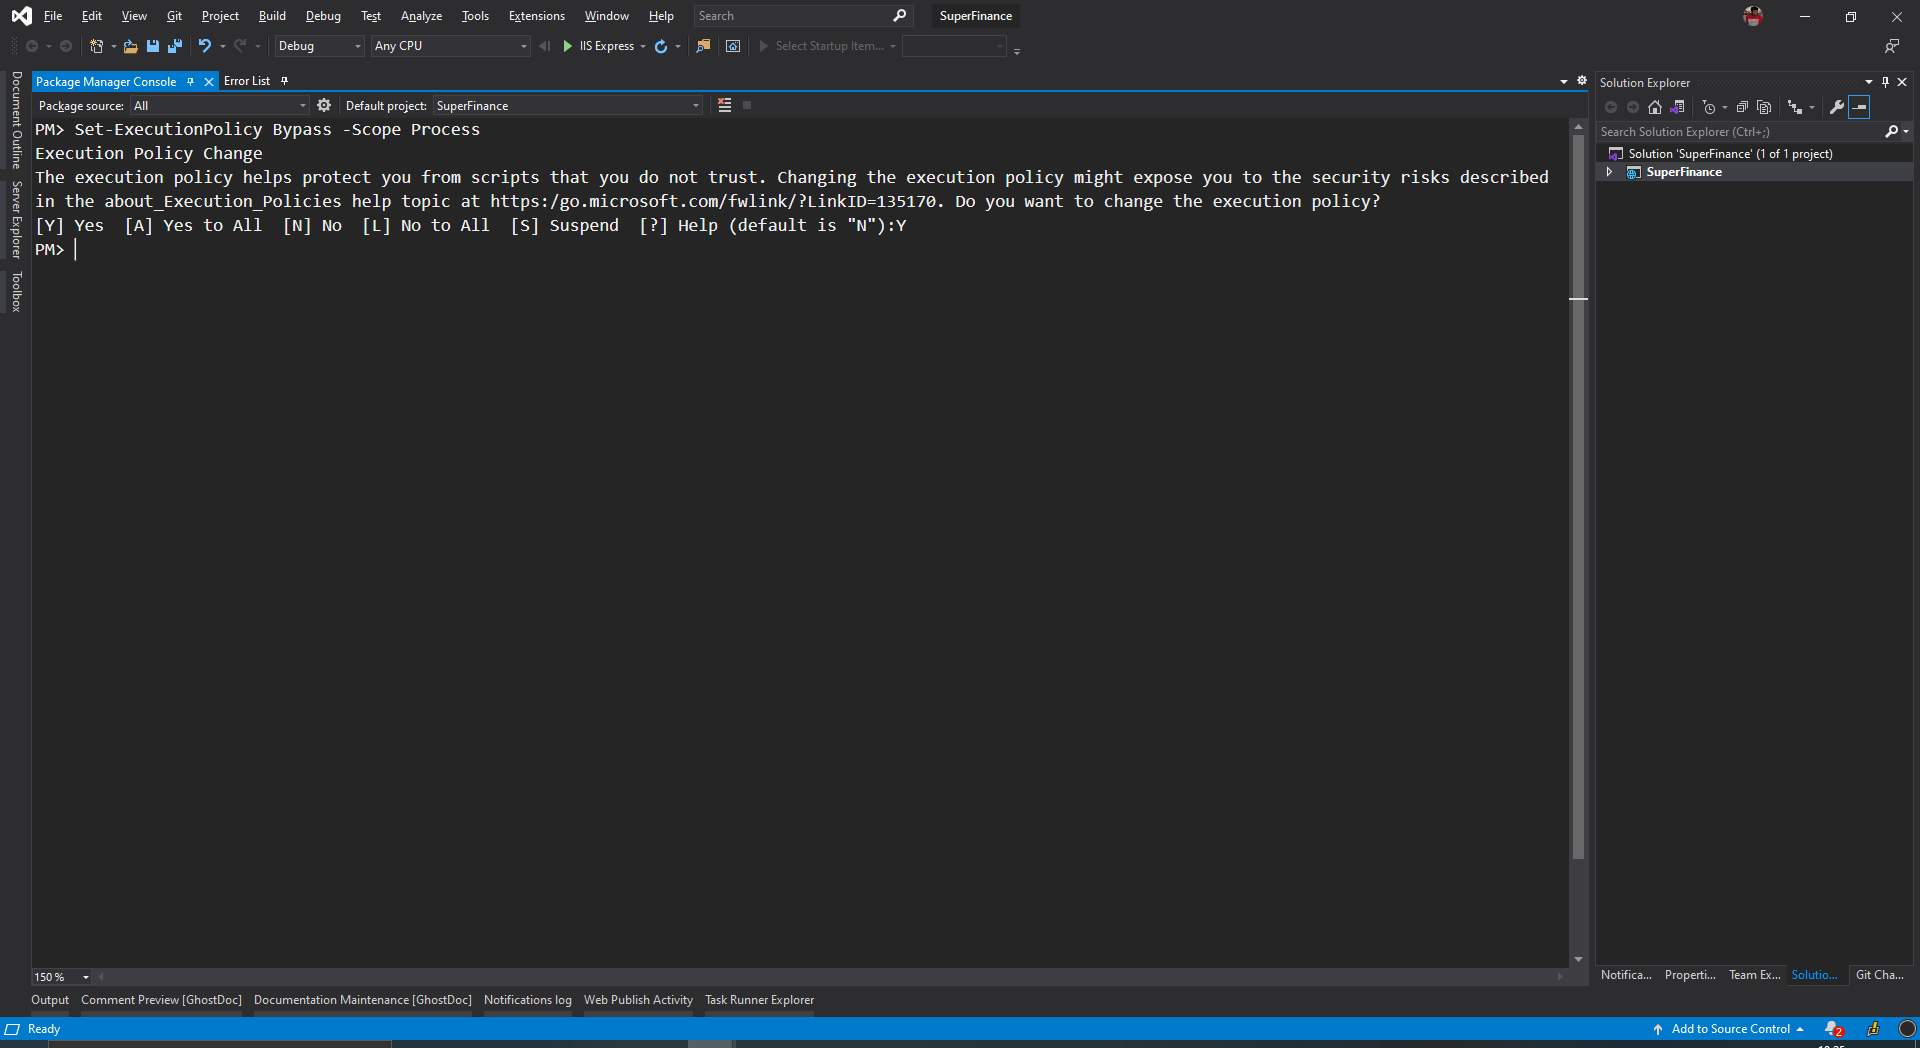
- You can now try running the
init.ps1yourself. Or, closing and reopening just the solution (and not the Visual Studio) should also execute theinitscript. - The above command enables execution of Powershell scripts for the current VS process; upon closing of the same, the policy would automatically reset to the earlier value. However, in case you want to reset it manually after working with ASKTools, you can do so by executing the same command but with different policy value like
Set-ExecutionPolicy RemoteSigned -Scope Process
How can I run init.ps1 script manually?
- First determine the location of
init.ps1which is inside the tools folder of the ASPSecurityKit.Tools package installed in your project.- For .NET Core projects, the location is the shared packages directory like ‘C:\Users\<username>\.nuget\packages\aspsecuritykit.tools\3.0.0\tools\init.ps1’ (make sure the PC username and ASPSecurityKit.Tools package version is as per your machine and project).
- For .NET Framework projects, the location is like ‘<path-to-your-solution>\packages\ASPSecurityKit.Tools-3.0.0\tools\init.ps1’ (Make sure you choose the version of ASPSecurityKit.tools as the one installed in the desired project if there are multiple versions).
- Open PM Console and make sure the desired project is selected.
- Execute the following commands:
cd '<path-to-tools-folder>' # changes the current working directory to the folder containing init.ps1
init.ps1 (join-path $pwd ..) $pwd (join-path $pwd ..) # executes the init script with arguments it requires.
- If you get an error stating something like “The term ‘init.ps1’ is not recognized as the name of a cmdlet, function, script file, or operable program.” it likely means that ASPSecurityKit.Tools isn’t installed in the selected project. Install it using the
install-packagecommand.
Issues with source package installation
Warnings/errors related to dependent NuGet packages.
In logs/PM console, you may see the following warnings/errors during NuGet package dependency installation:
- “Installation failed without any exception. You need to check whether NuGet package <name> installed successfully and fix it if it did not.”
- “Error determining NuGet package installation status with the default IsPackageInstalled method. Trying another method.”
- Etc.
The above can occur due to multiple reasons out of ASKTools control including network failure, NuGet.org connectivity issue, issue executing package’s Powershell scripts, issue with VS automation connection, etc.
You should manually check and install the NuGet packages with the issue or, you can try installing the source package again in the same project (which usually fixes any intermittent NuGet/VS automation connectivity issue). It’s better to restart VS before trying the installation again.
The EntityFramework commands aren't working in Package Manager Console.
This usually occurs immediately after source package installation as for some strange reason, the NuGet package installer either didn’t execute the EntityFramework Powershell scripts during the installation of EntityFramework package or the commands do not reflect even after execution.
An easy solution is to close and open the solution or, even better restart Visual Studio. The init.ps1 script of the EntityFramework Powershell tools should now be loaded by Visual Studio as it loads the solution.
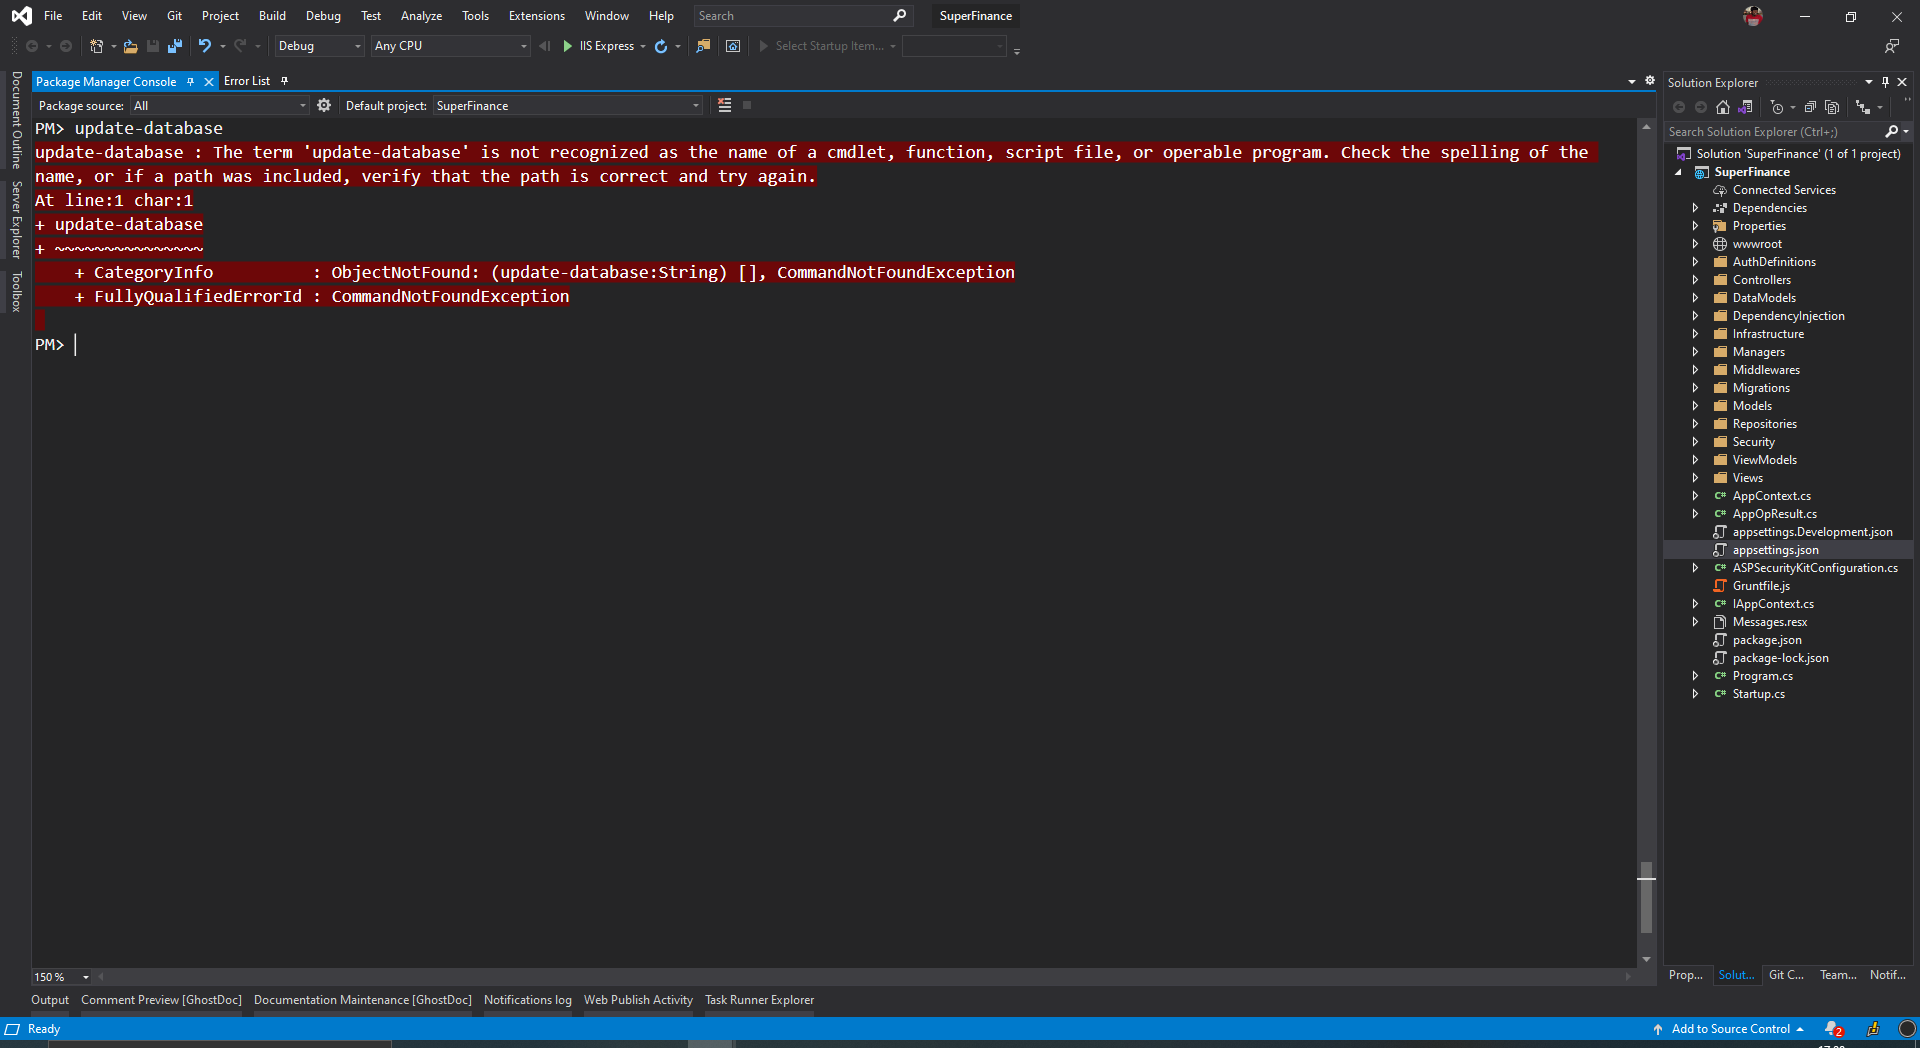
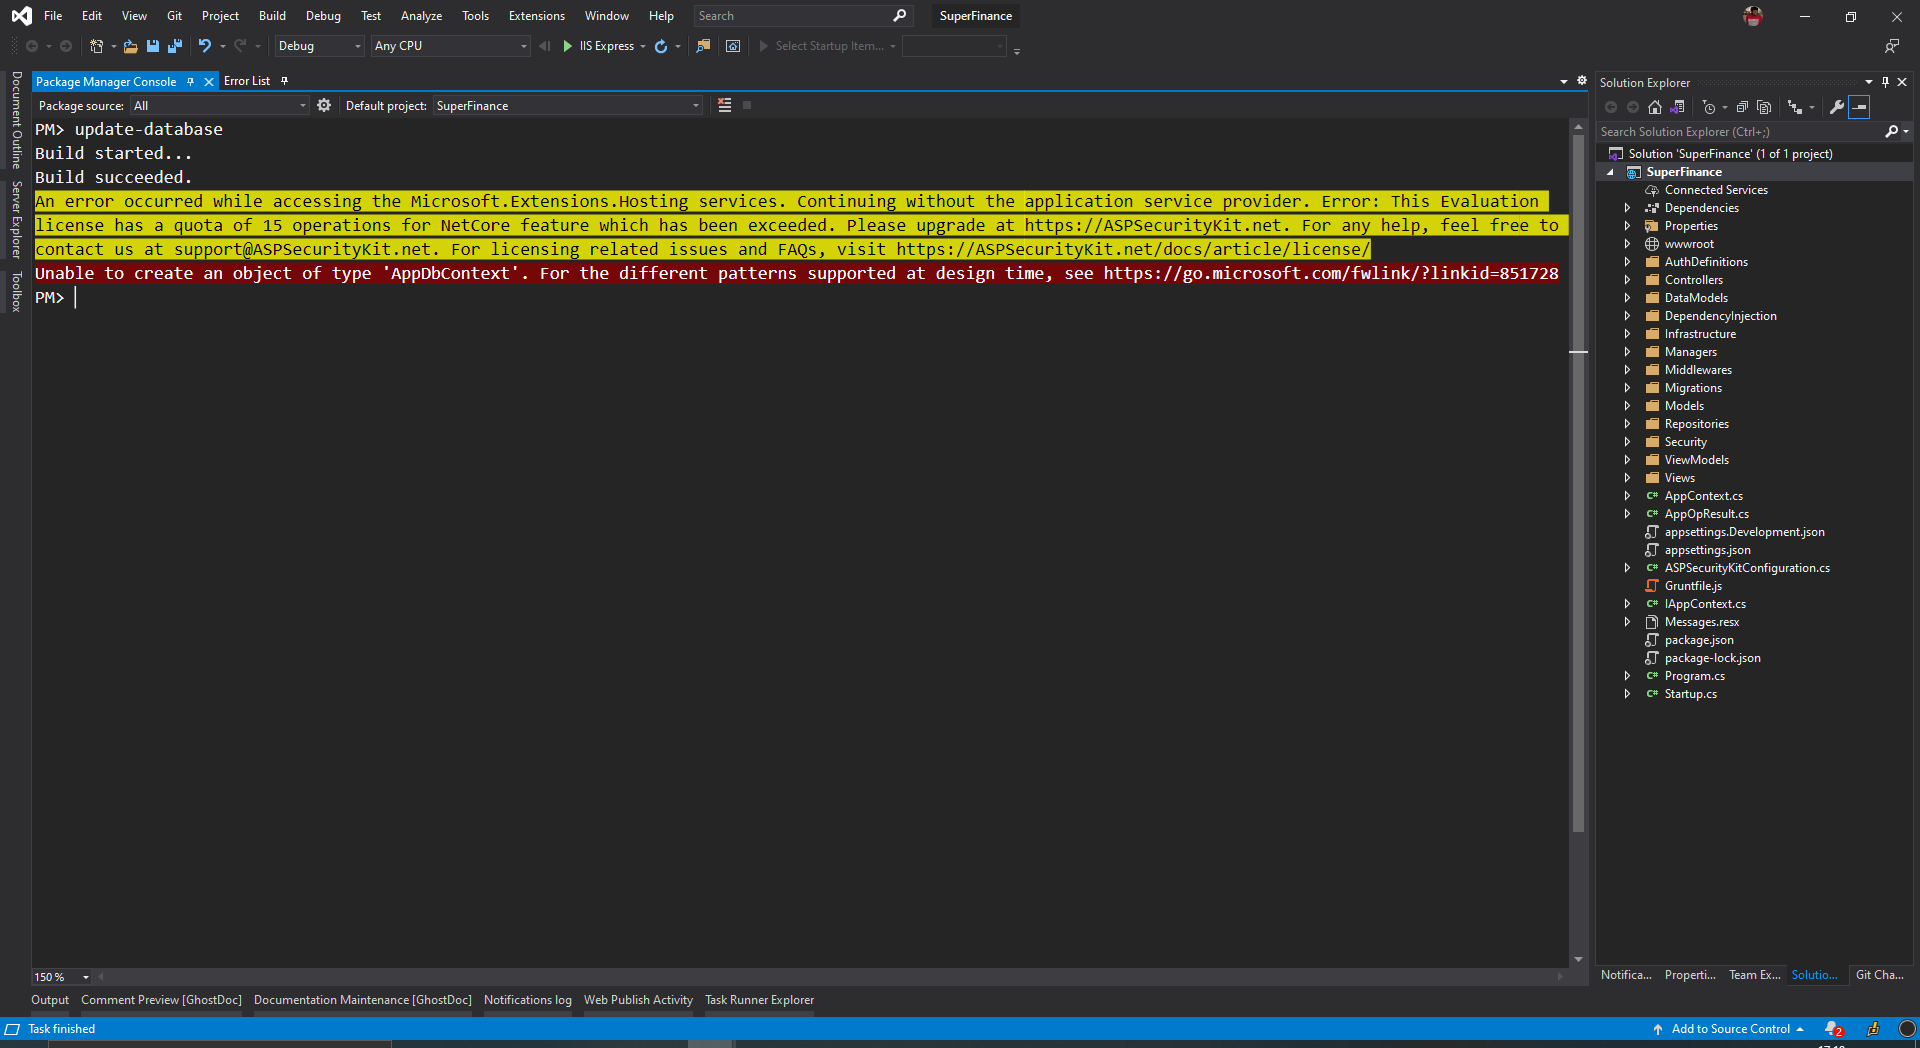
Error: This Evaluation license has a quota of 15 operations for NetCore feature which has been exceeded. Please upgrade at https://ASPSecurityKit.net. For any help, feel free to contact us at [email protected]. For licensing related issues and FAQs, visit https://ASPSecurityKit.net/docs/license
The problem occurs in .NET Core based project when running update-database command. This is usually caused by having no ASPSecurityKit license and the project exceeding number of operations permitted. The update-database command compiles and loads the project assembly and causes ASPSecurityKit license validation code to execute.
Other issues
System.Runtime.Remoting.RemotingException: Object '...' has been disconnected or does not exist at the server.
This error indicates an issue with the VS Automation model – the ASKTools UI connects to Visual Studio using the automation (COM) based interfaces. It’s possible that this COM connectivity may fault due to some bug or changes in the Visual Studio running state.
One solution to this problem is to close the UI and run it via the start-ask command again.